Whitewashing is a great way to bring the natural beauty of wood into your home in a new and exciting way. Whitewashing can brighten up tired spaces, and lend a more expansive look to even the smallest of rooms.
Best of all, learning how to whitewash wood is an effortless and straightforward project you should be able to tackle in a single day. Today, we’ll cover everything you need to know about how to whitewash wood.
What You’ll Need
Another excellent aspect of this project is that it requires very little in the way of supplies. Here’s everything you’ll need for your whitewashing project:
- Wood
- White paint
- Water
- Quart sized mixing bucket
- Paintbrush
- Shop rags
- Clear polyurethane (optional)
- Clear candle (optional, depends on the method you choose)
Method I: Paint & Water
One of the easiest and most popular ways to whitewash wood requires little more than some white paint and water. This technique works for any type of wood, but it’s best for new wood with a uniform grain.
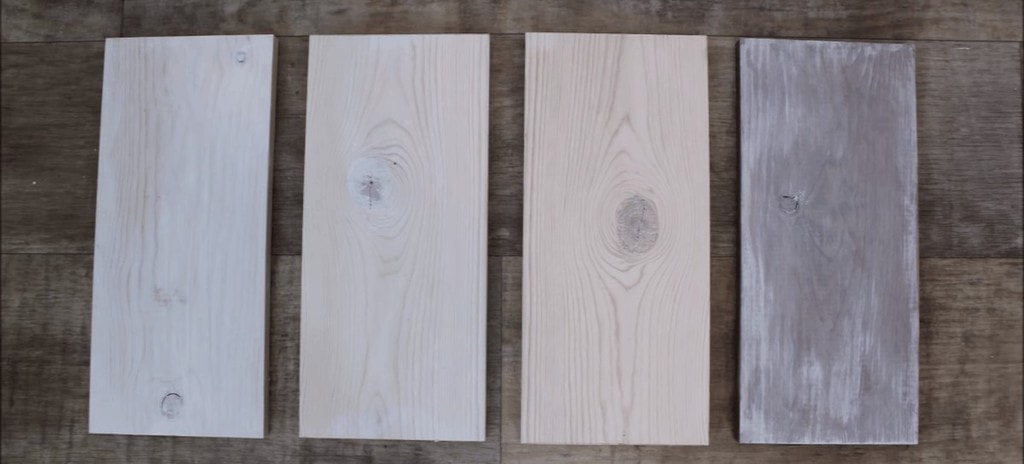
Using this method, the finished product will be smooth, uniform, and modern. This whitewashing style is perfect for when you’re hoping to add a touch of Americana without going entirely into country territory.
Step I: Prep the Surface
Before you get started, ensure that the wood you’re working with is clean and free of any dirt, debris, or defects before you move on to the painting portion.
Step II: Prepare the Paint
Next, you’ll want to mix your white paint in equal parts with water. Adding water to the paint reduces it’s opacity and makes it behave more like a stain than a paint.
Mix equal parts paint and water until the solution is uniform throughout.
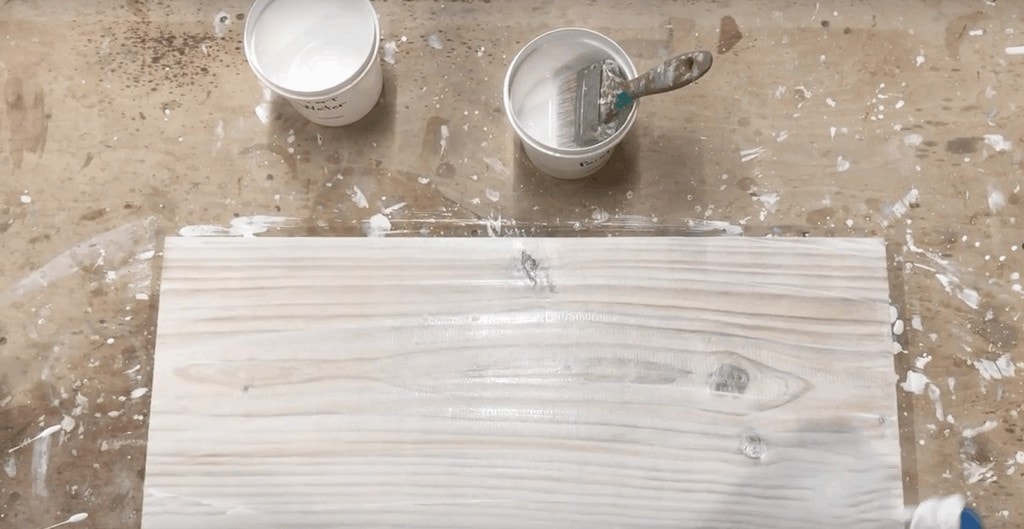
Step III: Painting the Wood
Now that your paint mixture is prepared, you’ll want to paint your wood in broad, even strokes, going with the grain of the wood. Don’t shoot for perfection, in fact, the more imperfect your paint job is, the better your final project will end up looking. The only thing you need to focus on this point is getting an even coat of paint onto your wood.
Step IV: Wipe Down the Painted Wood
Before the paint has an opportunity to dry, you’re going to wipe much of the paint off the wood. Fold a shop rag into a square and lightly wipe the paint in the direction of the grain.
Depending on the look you’re hoping to achieve, you may want to apply more pressure to the wood, removing more paint in the process.
Once you’ve achieved the desired finish, sit back, relax, and allow the paint to dry.
Step V: Finishing Touches (Optional)
Depending on the final look you’re hoping to achieve, your work may already be done. But, you can also apply a clear coat to your wood to preserve the beautiful finish you’ve just created.
Wipe a thin layer of the clear coat of your choice onto each piece of wood using a clean shop rag and allow it to dry. A matte or satin finish polyurethane clear coat is our go-to for projects like this, but you can experiment with different finishes to establish the look you’re happiest with.
Method II: Paint & Wax
Another popular process of whitewashing involves a little help from a pillar candle to achieve the final look we’re after. This method works great on any type of wood, including old or reclaimed wood, and wood with a pronounced grain. If you’re after a very rustic look, this is the best way to get it.
Step I: Prepare Your Wood
Before you get started, when it comes to how to whitewash wood, preparing your wood to ensure it’s ready for painting is important. This step is key if you’re working with old or reclaimed wood. Once any dirt or debris is removed, you’re ready to get started with whitewashing.
Step II: Waxing the Wood
Now, you’ll apply candle wax to the wood to get the process started. We find that it’s easiest to work with pillar candles that are either clear or white, but any clear or white candle will do.
Rub wax over the surface of the wood, varying your pressure as you go. This is far from a science, so don’t focus on trying to be perfect. All you’ll need is a light layer of wax randomly spread over some or all of the wood.
Step III: Paint the Wood
Next, paint the wood in the direction of the grain. Ensure that the entire surface of the wood is adequately coated in white paint. We’re not going to let the paint dry completely. Instead, wait about 15-20 minutes until the paint is tacky before moving on to the next step.
Step IV: The Whitewashing begins
Now, take a shop rag and fold it into a square. Wipe the cloth over the wood in the direction of the grain to remove paint from the wood. The areas where there was wax on the wood will come off quickly, revealing a spotty, vintage whitewashed look.
If you find that the rag isn’t removing enough paint from your surface, a moist cloth will take off more paint.
Step V: Finishing Touches (Optional)
This step is optional when it comes to how to whitewash wood, and for most people, it should probably be avoided entirely. With any luck, you should be looking at a finished product that seems heavily aged and rustic. If you leave the wood how it is now, it will continue to develop age and character over time.
But, if you prefer, you could apply a clear coat to preserve the state that the wood is in now. To do so, just rub your clear coat over the wood in the direction of the grain and allow it to dry.
Conclusion
Learning how to whitewash wood is one of the most useful finishing tricks you can have in your arsenal, and it’s a great way to add a unique and rustic look to otherwise dull wood. By following the steps above for either method we’ve described, you can create a beautiful whitewashed wall in no time.
Hungry for your next project? Check out our ultimate DIY guide to painted furniture.