Circular saws are often one of the first power tools beginning woodworkers buy. They are powerful, portable, and affordable. But there are so many choices. Which type should you buy? And, once you’ve brought it home, how do you use a circular saw? Are you looking for the best circular saw? Check out our guide, The Best Circular Saw Buyer’s Guide.

Types of Circular Saw
Circular saws can be divided into three main types: cordless circular saws, sidewinder saws, and worm drive saws. Each type has advantages and disadvantages, and each type shines in some applications while struggling with others. The type you buy should be based on what kind of projects you prefer to work on. Are you specifically looking for a DeWalt circular saw? Check out, DeWalt Circular Saw Overview.
Sidewinder saws have the motor mounted perpendicular to the blade, just off to one side. These saws tend to be the most affordable. Corded sidewinder saws are good all-around tools. They are light enough to be portable and powerful enough to cut anything. Unless you work in extreme conditions, sidewinder saws make a good choice.
Cordless circular saws use a sidewinder design, but typically use a smaller blade than corded saws. Cordless saws are great if you move around a lot, or if you work in places far from power. The drawback to these saws is that they usually aren’t as powerful as corded saws. They also tend to be more expensive.
Worm drive saws use something called a worm gear to drive the blade. Worm drive saws have more torque driving the blade, so they don’t bog down when you are cutting thick or hard material. These saws shine when you are cutting big boards for framing, or when you rip long pieces of hardwood. The downside of worm drive saws is that they are very heavy and tend to be expensive.
Circular Saw Blade Types
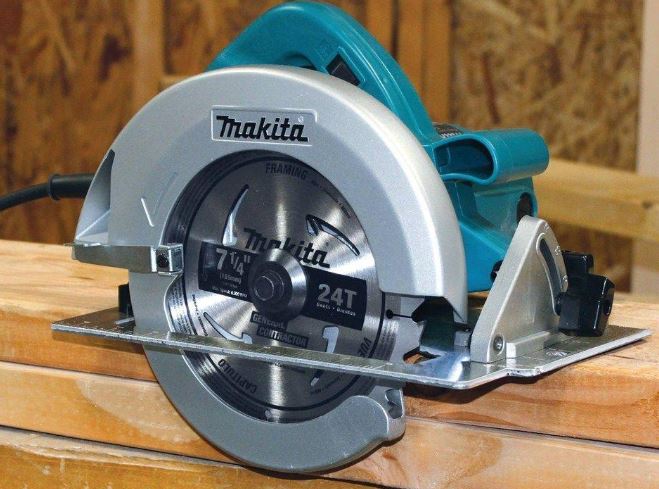
Once you have chosen your saw, you should check out some different blades for it. Always use the correct size blade for your saw. Using the wrong size blade can be bad for your saw, and it is also dangerous. Common blade sizes include 5 ½ inch, 6 ½ inch, 7 ¼ inch, and 10 inch.
Different blades have different numbers of teeth. Blades with many small teeth make smooth cuts but work slowly. Blades with few, large teeth are faster but leave a rough surface with more tear-out. Fine teeth are best for finish products and furniture, while coarse teeth are used for framing buildings.
Changing Circular Saw Blades
To change the blade on your circular saw, start by unplugging it or removing the battery. Pull back the blade guard and lock the blade in place. Some saws have a blade lock that does this job. Others will require you to grip the blade with vise-grips or pliers. Remove the blade arbor bolt with the wrench that came with your saw and pull the old blade out.
To install the new blade, follow the process in reverse. Circular saw blades cut in only one direction. Check the blade for markings that indicate which way it turns. Place the new blade in the saw, lock it in place, and re-install the arbor bolt. Your new blade is now ready to cut…almost.
Truing the Circular Saw Blade
Before you start cutting, use a square to check that the blade is true to the shoe. Circular saws have markings that indicate the angle that the shoe is set at, but these can be incorrect. Set the blade to the maximum cutting depth, then place the square against the blade and the shoe. If the blade isn’t perfectly square to the shoe, adjust the bevel to correct it.
Setting Circular Saw Blade Depth
Before you start cutting, set the depth of the blade so that it is just a bit deeper than the material you are cutting. There are two reasons to do this. First, you are much safer if you don’t have a lot of spinning blade exposed below the cut. If (God forbid) you do have fingers or legs under the cut line, having less blade exposed can be the difference in stitches and major surgery.
Second, it is easier on the saw to cut this way. With more of the blade exposed to the cut, the saw will cut smoother and bind less than if you just have a narrow slice of blade exposed to cutting. Your saw will cut faster and last longer this way.
Tips for Smooth Cutting
Circular saws produce a lot of tear-out—small splinters along the top side of the cut that are torn out of the top of the workpiece. If you are cutting framing members that will be hidden inside walls, nobody cares. If you are cutting material for furniture that will be on display, tear-out can be a big problem.
To reduce tear-out, there are several steps you can take. Start by using a fine-toothed blade. The finer teeth produce much less tear-out. You can also cover the cut line with masking tape to hold the wood grain in place. Some woodworkers swear by using a utility knife or marking gauge to pre-cut the fibers along the cut line. You can also put a sacrificial plate between the saw and the workpiece to protect from tear-out. Another way to ensure smooth cutting is with a guide rail. Check out The Best Circular Saw Guide Rail System for more information.
Cutting Thick Material

Sometimes you need to cut material thicker than the maximum depth of the blade. To make these cuts, start by scribing a cut line all the way around the piece. Drop the blade as low as it will go and cut along one side of the board. Turn the board 90 degrees, line up the blade with the previous cut, and cut again. Keep cutting and rotating until you get all the way around.
For big pieces, you may have to finish with a handsaw. Start the cuts with a circular lead to a much more manageable final cut. Using a handsaw following a circular saw also guarantees your handsaw cuts will be true, since you already trued up your circular saw blade.
Cutting Bevels with a Circular Saw
Some projects require you to cut the ends of boards at an angle other than 90 degrees. Most circular saws can cut bevels as well as making straight cuts. To cut bevels, unlock the bevel adjustment on your saw and tilt the shoe to the correct angle. Check the angle with a protractor to make sure your blade angle matches the plans.
Making a Circular Saw Rip Fence
Making long, perfectly straight cuts with a handheld saw can be a challenge. Pros often make a rip fence for their saw that makes both layout and cutting much easier. To make a rip fence, cut two pieces of plywood the length of the material you will be ripping. One piece should be about two inches wide, and the other should be about twelve inches wide.
Place the narrow piece on top of the wide piece with about eight inches of clearance to one side and at least two on the other side. Measure to make sure it is perpendicular, then glue or screw it in place. Use the narrow piece as a fence and trim the edge of the wider board. Repeat the process on the other side of the narrow board with the narrow side of the shoe. You now have a rip fence.
To use your fence, just clamp it on the work piece with the edge along your cut line. Slide the saw along the fence to get perfect straight cuts every time, without spending a lot of time on layout.
Crosscut Jig for a Circular Saw
You can make a crosscut jig the same way. The crosscut jig is shorter than the rip fence. It also has a small lip on the bottom that lets you line up the jig with the edge of your workpiece to get a perfect right angle. To make crosscuts, just drop the jig on the workpiece in line with your cut mark and pull the lip tight against the edge. If you installed the lip correctly, you will get perfect crosscuts every time.
Plunge Cuts with a Circular Saw
Sometimes you need to cut out a hole in the middle of a workpiece, like when you are installing a sink in a new countertop. Plunge cutting is a technique for cutting out these holes. To make plunge cuts, start by marking out the lines to be cut. Put the edge of the shoe against the workpiece and tilt the saw up, so the blade is above the workpiece.
Once the saw is in position, carefully pull back the blade guard and align the blade with the cut line. Engage the blade and slowly lower the saw into the workpiece. Follow the cut line until the blade approaches the corner of the hole. Turn the saw around and cut back to the other corner. Repeat this process on each edge of the hole.
Because the saw blade is round, you won’t be able to cut all the way to the corners of your hole. Finish the corners with a hand saw, jigsaw, or even a reciprocating saw. Even if you have to finish with a hand saw, this process is the fastest and easiest way to cut holes.
Speed Square
If you are framing, you will eventually need to cut rafters with angled ends. The best way to mark the angles is with a speed square. A speed square is a simple tool, but it is the best companion for your circular saw. Besides marking angles, a speed square can make a quick cut fence or help you mark rip lines.
Dado Cuts
Once you feel comfortable using your circular saw, you can try some advanced joinery. Joinery is the use of techniques to attach pieces of wood together in a stronger way. One common joint you can make with a circular saw is a dado joint. A dado joint is just a slot in one piece that holds the edge of the next piece securely.
To cut a dado, scribe both edges of the joint on your workpiece. Set your blade depth to match the dado on the plans. It will usually be a little less than half the thickness of the workpiece. Use a rip fence to cut one edge of the cut, then slide your rip fence over about 1/8 of an inch and cut again. Keep cutting this way until you have a clean channel for your joint.
Circular Saw Mastery
By learning to set up your saw properly and match your blade to your work, you can start to create some jigs and tools that will help you use your circular saw. Figure out the best ways to use your jigs, and you can start to apply some advanced techniques. Master those techniques, and you will be well on your way to becoming an expert woodworker.