Stepping into the world of wall repair can seem overwhelming. The multitude of materials available, including joint compound and spackle, can really challenge anyone not intimately familiar with the lingo. But don’t fret, we’re here to unfold the mystery and simplify this journey for you. This guide will walk you through the essentials of both joint compound and spackle, covering their types, benefits, drawbacks, and when it’s best to use one over the other. From small pinprick holes to larger, more glaring ones, we’ll help you make the smartest choice for your wall repair needs. Let’s hop right in!
Table of contents
- Quick Comparison Table
- Understanding Joint Compound
- Exploring Spackle
- Comparing Joint Compound and Spackle
- When to Use Joint Compound
- When to Use Spackle
- How to Use Joint Compound and Spackle
- Useful Tools for the Job
- FAQ
- Is it better to use spackle or joint compound?
- Do you use joint compound on drywall?
- How long will joint compound last?
- Can you use spackle as a skim coat?
- What’s the difference between spackling and plaster?
- How strong is spackle?
- What is spackling paste used for?
- How long does it take spackle to dry?
- What does spackle stick to?
- What is the best compound for drywall repair?
- Can you paint over spackle?
- What is the difference between joint compound and patching plaster?
- Conclusion
Quick Comparison Table
Here’s a handy table to help you sort out which one you need really quickly.
| Joint Compound | Spackle | |
| Uses | Ideal for larger projects like taping and finishing drywall seams. | Best for small, quick repairs such as filling nail holes and minor cracks. |
| Drying Time | Requires longer drying time, often several hours or overnight. | Dries faster, typically within 30 minutes to a few hours. |
| Application | Suited for heavy-duty applications and can be used in multiple layers. | Easier to apply for quick fixes, typically used in single or fewer layers. |
| Texture | Thicker consistency, suitable for creating smooth surfaces over large areas. | Lighter, less dense texture, ideal for filling small imperfections. |
| Durability | More durable, making it suitable for high-traffic areas and larger repairs. | Less durable compared to joint compound, best for areas with less wear and tear. |
| Sandability | Requires more effort to sand, but results in a smoother finish for painting. | Easier to sand, making it convenient for quick touch-ups before painting. |
Understanding Joint Compound
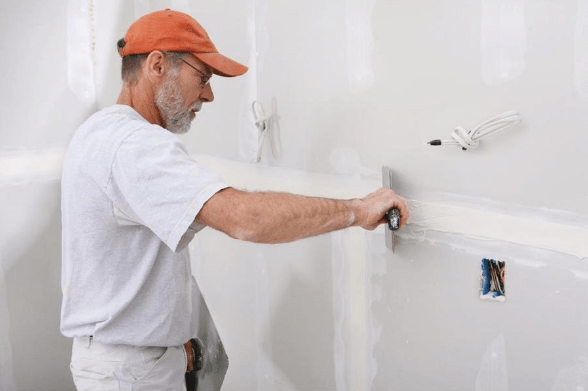
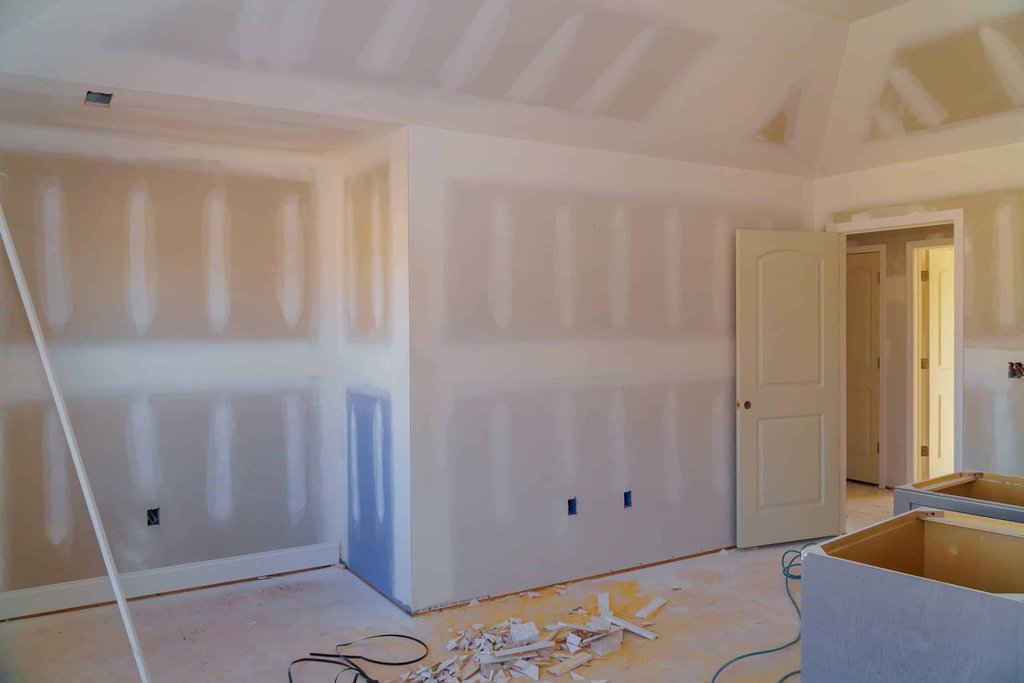
Joint compound, oftentimes referred to as drywall mud or drywall compound, is a white, creamy substance used to finish drywall seams and corners in new drywall installations. Rich in limestone, clay, perlite, and mica, it lends a smooth, consistent appearance when applied correctly. Speaking of applying joint compound, there’s a certain knack to it – this process often calls for multiple layers for an immaculate finish. But bear in mind, joint compound shrinks as it dries, so a little patience and time between layers is essential to get it just right. Summarizing, this stuff is wall magic, providing the perfect base for your painter’s brush.
Types of Joint Compound
Joint compounds come in various forms, each with unique properties and uses, that cater to different construction and home repair needs. Let’s dive deeper into these types:
- Taping Compound: This base layer compound is ideal for embedding joint tape during the initial stage of drywall finishing.
- Quick Setting Joint Compound: Excellent for urgent repair projects, this type hardens quickly, allowing you to add additional layers in a relatively short span of time.
- Topping Compound: This compound is lightweight and smooth, perfect for the final coat.
- Premixed Spackle: Though not technically a joint compound, this is widely used for small repairs due to its easy-to-use, pre-mixed consistency.
While their application methods are similar, their drying times vary, impacting the overall work speed.
Pros and Cons of Joint Compound
Joint compound, also known as ‘mud’, has both benefits and drawbacks. On the upside, more joint compound can be effectively used to fill thicker holes, making it a versatile choice for home repairs. Additionally, it typically comes in a large container, which can offer better value for bigger projects. On the flip side, excess sanding is a common challenge with joint compound due to its nature. Plus, drying could take longer, especially if there’s a chemical reaction with the underlying material. Hence, your project’s size, timeline, and complexity should inform your choice.
Exploring Spackle
Spackle is an ideal choice for minor repairs in your home, especially for filling small holes in drywall, plaster, or wood. Composed of gypsum powder and binders, it creates a smooth surface once applied and dried. Often referred to as ‘lightweight spackle’, its unique composition makes it easier to spread and sand, making it perfect for repairing holes and imperfections that disrupt the harmony of your walls or furniture. So, if you’re looking to perform minor fixes around your home, spackle might just be your new best friend!
Types of Spackle
When discussing Spackle, it comes under various types, each having its distinctive properties. For instance, some may contain fine aggregate, perfect for more extensive wall repairs. Others are crafted with sodium silicate, providing a robust final product. Certain categories offer a thinner paste, blending seamlessly into your wall for the effortless patching process. Understanding their unique qualities will optimize your DIY home repair trajectory. Remember, each type of spackle dries at different rates, so planning your repair roadmap is critical.
Pros and Cons of Spackle
Spackle, as versatile as it is, does have its own set of pros and cons. On the positive side, spackle is perfect for filling small holes, is easy to apply to a well-prepped surface, and unlike joint compound, it doesn’t require a layer of fiberglass mesh. Moreover, both spackle types – lightweight and all-purpose – dry completely, which is a huge advantage. However, the downside of spackle is that it tends to shrink during drying, requiring multiple applications for larger holes. Plus, if you apply excess spackle, it becomes difficult to sand down to a smooth finish.
Comparing Joint Compound and Spackle
When it comes to wall repairs, choosing between joint compound and spackle can be tricky. Joint compound, often referred to as just mud, is usually used for bigger repairs. It’s great for filling in deep cracks and smoothing out dried coats of other compounds. However, it can take a long time to dry. Spackle, on the other hand, is your go-to for smaller jobs. It’s easy to apply and dries quickly, making it perfect for those last-minute touch-ups. While joint compound is usually used for the final coat, spackle shines when it comes to quick fixes and minor repairs. Always choose based on your project needs.
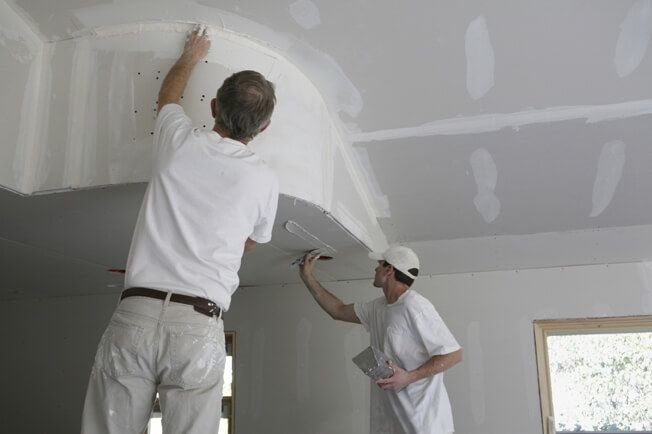
When to Use Joint Compound
Joint compound, widely recognized for its efficiency, excels in more substantial tasks related to drywall. This includes drywall installation and finally finishing drywall. Ever noticed the fine gypsum dust or gypsum powder when you’re working? That’s a sign of joint compound at work!
Use it when:
- Patching larger holes and cracks
- Smoothing over taped seams
- Applying a skim coat for texture
Remember, to ensure a smooth and seamless finish, sand lightly between each coating. This is your expert tip for a professional look!
When to Use Spackle
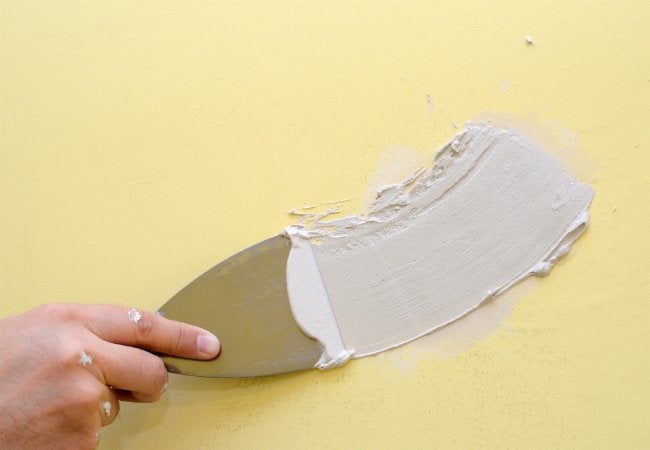
When a minor home repair is in order, spackle comes out playing. Quick fixes like filling nail holes, patching up small holes, or mending small cracks call for the easy application of spackle. As a pro tip, ensure the area is clean and use a putty knife for maximum precision. Small repairs are easy breezy when you choose spackle, providing a smooth, paint-ready surface in no time. Remember, spackle is your go-to for minor fix-ups that require minimal drying time.
How to Use Joint Compound and Spackle
Whether you’re tackling a major drywall installation or simply filling in a few small holes, knowing how to properly use joint compound and spackle is essential for achieving a polished look. This section provides step-by-step instructions to guide you through using each product effectively, ensuring your wall repairs are seamless and durable. Follow these tips to master the art of wall repair, whether you’re dealing with large holes or minor imperfections.
Using Joint Compound for Drywall Installation and Repair
- Preparing the Surface: Before applying drywall joint compound, ensure the drywall is properly installed. For installing drywall, measure the exact length needed, cut the drywall, and fix it into place using screws.
- Applying Joint Compound: Start by applying a thin layer of spackle joint compound over the seams or holes. Use a putty knife to spread the compound smoothly. For larger holes, apply the compound generously to fill the hole completely.
- Taping: Place drywall tape (or corner beads for corners) over the freshly applied compound. Press the tape firmly into the compound.
- Adding Multiple Coats: Once the first layer dries, apply additional coats of compound. Each coat should be thinner than the last. Allow each layer to dry for a few hours before applying the next. This process is crucial for deeper holes or larger repair areas.
- Sanding and Finishing: After the final coat of joint compound has dried, sand the surface to create a smooth finish. Remember, large quantities of joint compound might require more sanding. Also, certain types like quick setting compound dry faster, which is beneficial for most homeowners.
- Storage: Store any unused drywall joint compound in an airtight container to prevent drying out.
Using Spackle for Quick Repairs and Smaller Holes
- Preparing the Surface: Clean the area to ensure the spackle adheres properly when you go to fill small holes.
- Applying Spackle: For small repairs, use a putty knife to apply spackle directly into the hole or crack. Ensure you fill holes completely with spackle. For filling small holes, a single application may suffice, but for slightly larger or deeper holes, you might need to apply multiple layers.
- Letting the Spackle Dry: Allow the spackle to dry. The drying time can vary depending on the type of spackle used. Quick setting compound is ideal for fast repairs as it dries within a few hours.
- Sanding for a Smooth Finish: Once the spackle is dry, sand the area lightly to create a smooth surface. This step is vital for fixing imperfections effectively.
- Storage: If you have leftover spackle, store it in an airtight container. Spackle stored properly will have less shrinkage and can be used for future repairs.
- Considerations for Large Containers: If you’ve purchased spackle in large containers for larger projects, ensure you mix it well before use, as separation may occur in large quantities.
By following these detailed steps, most homeowners can effectively use both joint compound and spackle for various home repair needs, from installing drywall to fixing minor imperfections.
Useful Tools for the Job
There are two tools that could make working with drywall, plaster, and walls much easier: a reciprocating saw and a sander. Here are our recommendations:
- Best Reciprocating Saw – Read our easy guide to find the best choice for your repair, demo, and building projects.
- Best Orbital Sander – sanding is huge work and dust collection is annoying. Read this guide to find a sander that makes everything simpler.
Apart from these tools, you might want a good trowel, mixing bucket, scraper, and putty knife.
FAQ
Is it better to use spackle or joint compound?
Spackle is best for small, quick repairs like filling nail holes or minor cracks due to its fast drying time and easy sandability. Joint compound, on the other hand, is ideal for larger projects like covering drywall seams or smoothing wall surfaces, as it is more durable and suitable for heavier applications.
Do you use joint compound on drywall?
Yes, joint compound is commonly used on drywall for taping, finishing drywall seams, and repairing holes. It provides a smooth, paintable surface once sanded and is essential for achieving a seamless look in drywall installations.
How long will joint compound last?
An unopened container of joint compound can last up to 9 months if stored properly in a cool, dry place. Once opened, it should be used within a few weeks. Be sure to seal the container tightly to prevent the compound from drying out.
Can you use spackle as a skim coat?
Using spackle as a skim coat is not recommended. Spackle is designed for small repairs and dries harder and faster, making it unsuitable for the thin, even layers required in skim coating. For skim coating, a joint compound is more appropriate due to its smoother texture and longer working time.
What’s the difference between spackling and plaster?
Spackling is a lightweight compound mainly used for filling small holes and cracks in walls, while plaster is a heavier material used for coating, shaping, and molding walls and ceilings. Plaster provides a more durable and harder finish compared to spackling.
How strong is spackle?
Spackle is relatively strong for its intended purpose of filling small holes and minor cracks. However, it’s not as strong as joint compound or plaster in terms of holding power and durability, especially in high-traffic areas or for larger repairs.
What is spackling paste used for?
Spackling paste is primarily used for repairing small holes, dents, and minor imperfections in walls. It’s ideal for quick touch-ups before painting, as it dries quickly and sands to a smooth finish, making surfaces ready for painting or wallpapering.
How long does it take spackle to dry?
The drying time for spackle varies depending on the type and the thickness of the application. Generally, lightweight spackle can dry in as little as 30 minutes, while heavier applications or all-purpose spackle may take a few hours to dry completely.
What does spackle stick to?
Spackle adheres well to most interior surfaces including drywall, plaster, wood, and even painted surfaces. It’s essential to ensure the surface is clean and dry before applying spackle to achieve the best adhesion and finish.
What is the best compound for drywall repair?
The best compound for drywall repair depends on the size and type of repair. For small holes and cracks, lightweight spackle is ideal due to its quick drying time and ease of use. For larger repairs, such as drywall seams or bigger holes, joint compound is recommended for its strength and flexibility.
Can you paint over spackle?
Yes, you can paint over spackle once it’s fully dry and sanded smooth. It’s important to prime the spackled area first to ensure an even paint finish and to prevent the spackle from absorbing the paint, which could result in a patchy appearance.
What is the difference between joint compound and patching plaster?
Joint compound, also known as drywall mud, is primarily used for finishing drywall seams and repairing small to medium-sized holes. Patching plaster, on the other hand, is thicker and harder, making it better suited for repairing larger holes and cracks in plaster walls where more durability is needed.
Conclusion
In wrapping up, the selection between joint compound and spackle relies heavily on the specifics of your wall repair or renovation tasks. Quick setting compounds and drywall might be ideal for larger projects, given their strength and durability. Conversely, Spackle comes out on top for filling wide holes due to its quick-setting, easy-to-sand properties. Varieties like powdered mixes add to its versatility. Understanding your particular needs before diving into a project can drastically affect the results.