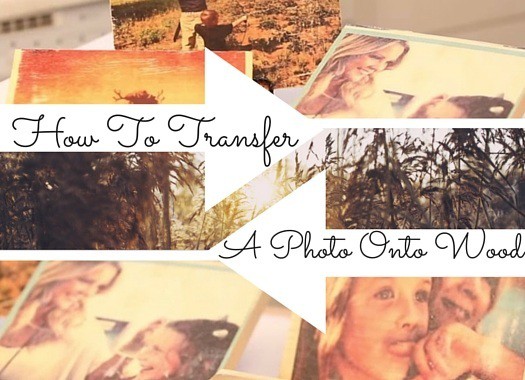
Here is a project that I once thought was much more complicated than it really is. I assumed you had to own some special kind of printer that runs pieces of wood through and prints the images onto them. Sounds kind of silly now...
In all actuality, transferring photos onto wood is extremely simple and doesn't take any special tools or materials. DIY mommy HeyKayli gives us the full scoop (video below)!
The best news....it's only 5 easy steps!
What you'll Need
Quick Tips
- The thinner the paper the better. So, if you go to Kinko's or some place similar, be sure to ask for the thinnest paper.
- Ensure the photos are printed the same size as the piece of wood you are using.
- Sand the wood before you start (especially along the edges)
Hope you're ready because...here we go!
Step One
Apply a generous amount of Gloss Gel onto the wood using your sponge brush. The transfer will not work if the amount is not generous. I can't stress enough...generous. Ok, you get it. Smooth it out a little but to ensure even coverage.
Be sure to include the sides of the wood if you want the photo to extend beyond the edges.

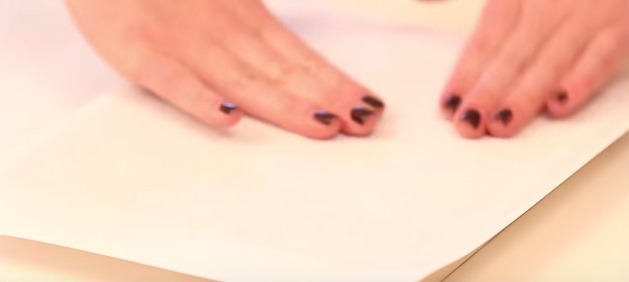
Step Two
Place wood onto the face of the picture and firmly press down around the wood evenly.

Turn the wood over until the paper is on top and gently smooth away any bubbles or uneven surfaces. Use your hands. If you try to get clever and use something with a hard edge (like a ruler) you run the risk of tearing the paper.
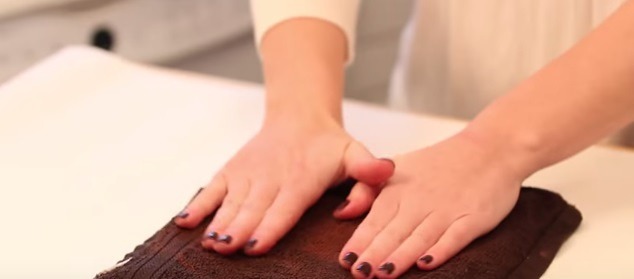
Step Three
Let the wood and paper dry overnight (or at least 8 hours) to ensure the transfer was successful.
Place a wet rag over the paper side of the wood piece and press down for a minute or until the paper is thoroughly damp.
Step Four
Using your rag, begin scrubbing away the damp paper from the photo that is now transferred onto the wood.
Try not to scrub too much after the paper is removed or the photo could be damaged.
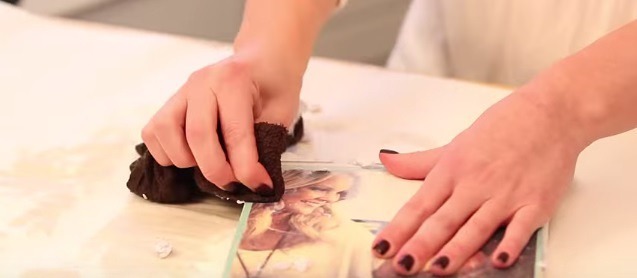
Go through a few iterations of letting the wood dry a few minutes and wiping it off until the paper residue is essentially gone.

Step Five
Evenly apply 2-3 coats of Mod Podge to the wood photo and let it rest until dry. This tutorial features an Antique Matte Mod Podge, but it is up to individual tastes.

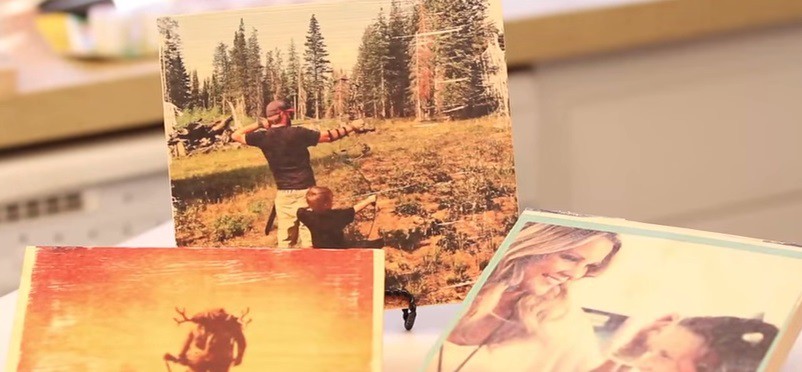
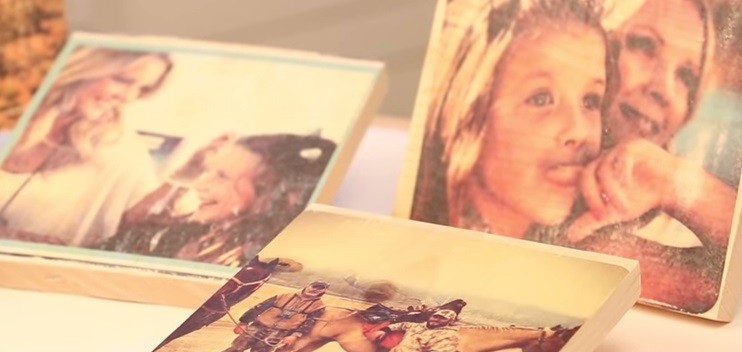
Finished!
Now, didn't I tell ya? It's really that easy!
Add a few screws on the back to hang or let it rest on a table, and you're the envy of the neighborhood!
For more incredible projects, how to's, saw reviews, or woodworking, click here.
Ask The Saw Guy
Talk with Tool Experts & Woodworkers in minutes 24/7
Need Help?
Talk with a tool expert in minutes

Brian, Woodworker
2,153 satisfied customers
Licensed Contractor - 17 years
Brian, Woodworker
2,153 satisfied customers
Love this! Do you have to reverse the picture before you print it?
Thanks!
If you print photos at home, what’s the best option for paper?
thank you so much for showing how to transfer the paper I have always wanted to know how my son races cars and he has many pictures
Not as easy to do this as you make it look. It takes a lot of practice to perfect it.. What is the best way to smooth out any air bubbles? What is the best photo paper to use? How damp is too damp?
Maybe silly but..your materials say regular paper..my brain tells me computer paper?
Gloss Gel and Mod Podge would be considered “special materials”. A Pitcher is something that holds a liquid. Like a water pitcher. A Picture is what you would transfer.
Does the picture need to be printed with ink for this to work? Will a picture printed with toner work?