Building a new deck for your home is a stylish and satisfying way to freshen up your lawn and make outdoor activities more fun and accessible. It doesn’t take a skilled professional contractor to build a simple deck, but decks come in all shapes and sizes and a DIY deck building project is a big undertaking. But building decking for your own home is a rewarding experience you can enjoy for years to come.
Before you hit the hardware store, you should learn everything there is to know about how to build a deck so you can get it right the first time.
Parts of a Deck
All decks share a few common parts, but there are also some optional components that your deck project may or may not need. We’re going to cover the most basic style of decks today, the on-grade deck. This means that you build the deck above the ground and you don’t need to build deck posts or railings. However, we will briefly mention digging post holes, just in case you need them or your deck won’t be built on level ground.
All decks will have a deck frame, joists for support, and a flat decking material that overhangs the rim joists. Metal flashing is used to attach the ledger board to the house, and 2x lumber is your best choice for the job. In fact, some deck builders prefer to double up on the lumber. In other words, for an 8-foot rim joists, you’d need two 2×8 boards.
Safety First
We aren’t covering raised deck building, but if you need to use a ladder, always be sure to have a spotter to hold the ladder in place. While it only takes fairly simple tools to build a deck, be sure to follow common workshop safety practices.
Always wear your protective eyewear especially when cutting or sawing. Don’t wear loose-fitting clothes or any jewelry on the job site at any time. And while you aren’t working in a factory or warehouse setting, steel-toed boots can always be a good choice when working with heavy lumber.
Building a Deck Step by Step
Step 1: Rope Off the Deck Borders
The first thing you do before you even begin building the deck itself is mark off the work area. Use wooden stakes to create an outline where the edge of the deck will be. Connect these with a long piece of twine and check that the shape looks like the way your deck should look. You can then use spray paint or more stakes to mark the specific locations where your footings will go.
You can use batter boards to help ensure that your project area is level. Batter boards are temporary boards that help you keep your structure even and level before it’s complete when you can’t see the finished product.
Step 2: Install the Deck Ledger Board
First, you’ll have to remove the trim and siding from the building. Take off enough for the ledger board plus one extra foot on top. For now, use a waterproof sheet to cover over the exposed sheath. Note the specific location where the top of the ledger will rest. Make a line here and be sure that it’s level.
You’ll then need deck spacers atop the ledger. For each 2′ of ledger, use a nail to fasten a 2″x1.5″ treated wood spacer. Make sure the spaced are treated for weatherproofing before installation, as this is the last time you’ll see them.
Line up the ledger with the spacers and secure it to the house by nailing it at the location of each spacer. If there are multiple ledger boards, the seams should line up with a spacer. Use long nails to ensure the board holds firmly in place against the house.
Next, drill a 3.5″ hole into the ledger board and the rim joist of the house at the location of each spacer in a sawtooth pattern. Secure each hole with a .5″ lag screw and tighten. Be sure to use a washer for each screw.
Take more of your waterproof membrane and cut it to the length of your ledger. Adhere it to the joint you just created so that half covers the spacers and the block, and the other half runs up the wall of the house. Then, cut out a 6″ wide strip of flashing to the length of the ledger board. If you need multiple strips, overlap the ends (by at least 4 inches) and caulk them together. Fold the flashing long-ways to a right angle and secure it over the waterproof layer.
Nail the flashing through its top edge roughly every 8 inches. Seal using double joist hangers at each end of the ledger board along the bottom.
Step 3: Create Your Deck Footings or Posts
At each spot where you marked off a footing, start by digging a hole that will keep the footing in place. You need to go a couple of inches below the frost line to ensure that the cold weather doesn’t freeze the ground below your footings.
You can pour concrete footings or you can purchase prefabricated deck footings. If you decide to buy prefabs, you’ll need to be sure that they’re specced for the size of lumber you’re using for your deck.
Make sure to pour each footing to the same height. Your plans should detail the height of each footing. Measure from the top of the ledger to the pier tube on the footing. From here, go down 1/16th-inch per foot of the pier’s distance from the wall, plus the height of the joist and the base of the post. Make a mark at this spot and repeat the process for each footing. Trim the pier tubes at these measurements.
Pour your concrete and mix with a shovel to get out any air bubbles. It will take a full week for the concrete to harden and cure to maximum strength. You’ll install anchors after the concrete has been allowed to dry for at least 48 hours.
Step 4: Place Deck Beams and Rim Joists
Put a post base on top of one of the piers such that it won’t get in the way of the joist hangers and make a mark. Drill into the pier with a masonry bit on each pier and place an anchor bolt.
Take your 2x lumber and cut your rim joists and beams by using a strong construction adhesive and then nailing them on both sides. Use long nails in a sawtooth pattern as described above. You’ll create the front rim joist in the same fashion by fastening two pieces of lumber together.
Connect one rim joist into the joist hanger on one side of the ledger that we installed earlier, make sure the corners are flush, and nail at an angle to connect the hanger to the ledger. You’ll place the opposite end of the joist on one of the corner piers, and then repeat the process with the other outside joist on the opposite end of the ledger.
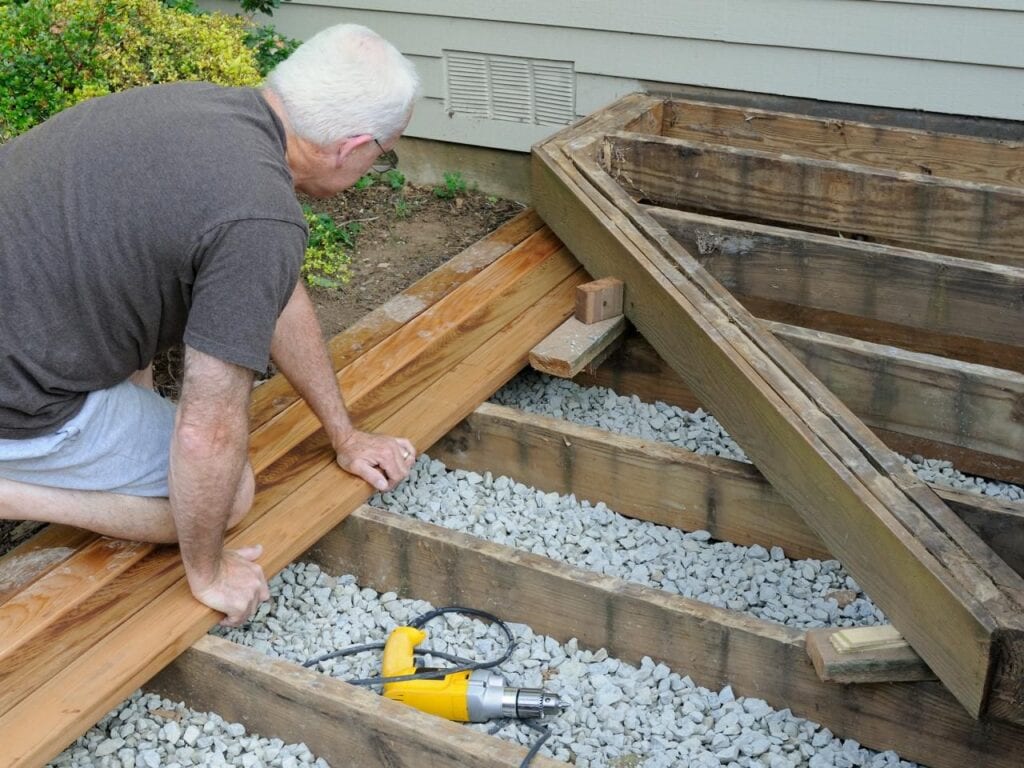
Step 5: Place the Interior Deck Joists
On the interior side of the front rim joist, install double joist hangers at the locations where your side rim joists will sit. Now connect the front rim joist to the post bases. Connect the first side rim joist into one of the hangers and secure with long nails through the face of the front rim joist into the side rim joist. Then do the same on the other side.
With the frame of the deck in place, install face-mounted double joist hangers for the inner joists every 8 feet centered along the front rim joist along the bottom edge. Hang an equal number of face-mounted double joist hangers all the way across the ledger directly opposite the hangers on the front rim joist. Then install each interior joist the same way you did with the front and sides.
Nail each joist into each hanger as you did before. Ensure that all of the joists are secure and that the structure is level once more.
Step 6: Install the Decking
Install treated trim board to the outside of the rim joists, and then measure from the ends of the front rim to the wall of the house. This is the length you’ll cut your deck boards to. On the top edges of each rim joist, liberally apply sealant along the entire length of the beam. Lay the first deck boards across the sealant such that the long edge hangs over the trim board by an inch. Nail each end of the decking boards to the frame.
Use finish nails along the sides of the first board to ensure even spacing. Repeat the process of laying deck boards until the decking is complete. When replacing the siding on the house, come within 1/2 inch of the decking and frame.
Step 7: Staining Your Deck
Treated wood will last for many more seasons and will keep your deck sturdy. It’s important that you stain your deck with weatherproof lacquer to keep it safe all year round. You’ll want to re-stain your deck at least once per year to keep the lumber looking its best.
If you’re going to paint your deck, be sure to use paints that are weatherproof and environmentally safe.
With carefully-built and well-treated decking, your house can have a whole new appeal and even see a boost in property value. Building decking yourself is a difficult project, but it adds great value to your home.