
Concrete makes a fantastic countertop surface in any bathroom, kitchen, bar, or outdoor buffet. Not only is it literally rock-solid, but it’s stylish, versatile, and easy to clean and maintain. Concrete countertops are popular for both in-home and restaurant use, but what makes concrete the right choice for you? Before buying your new counters, join us as we teach you all you need to know about concrete countertops.
Why Build Concrete Countertops?
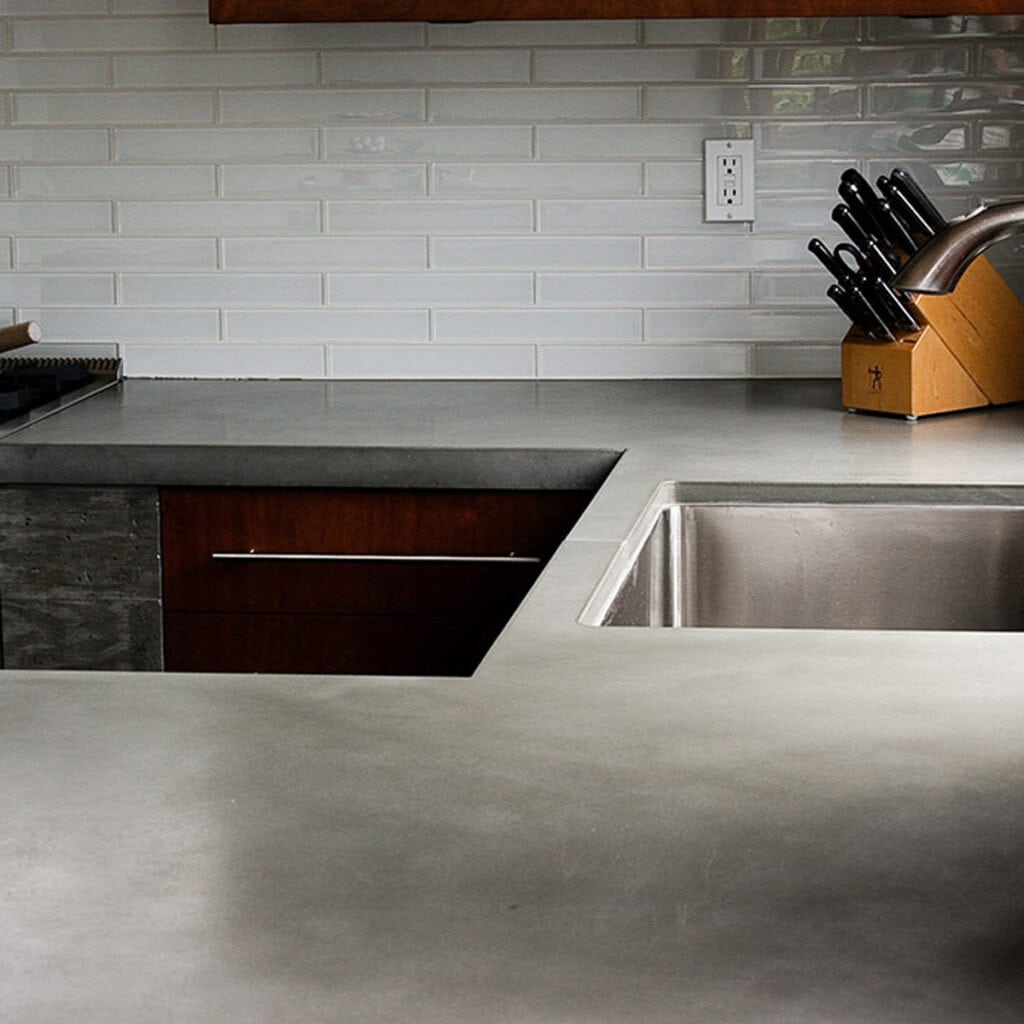
Concrete counters are available in a range of colors, whether you like a brighter slate look or a darker, deeper obsidian style appearance. Asa a result, you can find concrete styles that will go with any decor in your home, even if you need different looks for different bathrooms.
Concrete also offers the key benefit of longevity. More than any other type of countertop material, concrete will last for decades as long as you take good care of it. Once you decide to go with concrete for countertop needs in your kitchen and bathroom, you’ll never need to buy a new counter again.
Drawbacks of Concrete Counters
While concrete countertops offer you huge benefits, there are a few notable drawbacks you should be aware of before trying to make concrete countertops yourself. More than most other countertop materials, concrete is prone to ugly stains. While these can and should be cleaned with relative ease, untreated stains can add up and eventually set into the pores of the concrete, making them very difficult to get out. You have to work a little harder than usual to keep concrete looking as clean as other styles of countertops like marble or epoxy.
Concrete isn’t hard to work with by itself, but to make concrete countertops yourself is a big undertaking. You need some experience in working with concrete and making molds. Otherwise, you’re better off hiring a contractor who can make concrete countertops for you because he does it for a living.
Not only is it a big project, but it’s a project that takes time. After you’ve finally designed and poured your concrete countertop, you have to leave it undisturbed for a significant amount of time to dry and cure.
If you do have to hire a contractor, these projects get expensive quickly. You typically won’t buy concrete countertop sections and simply connect them together like cheaper counters. A concrete countertop is a custom job, and as a result, it costs more than laminate counters. Be prepared to spend a little more if you want the long-lasting functionality and style of a concrete countertop.
Planning Your DIY Concrete Countertops
We’ll get to the specific steps for making your mold and creating your countertop soon, but before you even begin, there are some important considerations to make if you’re going to pour your own concrete countertops.
First, counters take up a lot of space in your kitchen. You’ll need at least that much space somewhere else to assemble your mold and eventually pour the concrete. If you live in a smaller home, you may quickly find yourself buried in materials for your project. Depending on how much time you have to spend on your counters, you may need a couple of weekends to complete this job. Make sure you give yourself enough time and you have enough space to make your counters before you commit to the project.
How to Build DIY Concrete Countertops
First, you’ll need to measure your existing counters before you can make the mold for your new ones. To do so, measure the base cabinets first, then add 3/4″ to account for overhang. This will tell you how big the actual counters are going to be. Make sure that you get large enough particleboard and enough concrete for your job.
If you have a sink in your counter, you’ll need to measure the opening for the sink. Use painter’s tape around the sink area to stop concrete from clinging to the inner edges during pouring.
Make the Mold
On a couple of sawhorses, rest a 3/4″ sheet of melamine particle board larger than the countertops will be. You might want to use a couple of supports under the middle as well since the concrete itself is pretty heavy. Jot down the dimensions of your new counter on this panel, and use your table saw to cut 1.5″ wide pieces of the melamine particle board for the side pieces of your mold. You may have to adjust this for the thickness of your own counters.
Note: In some places, municipal codes may require that kitchen counters have a minimum 18″ clearance between the top of the counter and the bottom of the hanging cabinetry. Make sure that you know the codes in your community and you build your new concrete counter to the appropriate specifications.
Next, measure the strips and cross-cut them to the correct length. The strips that you use on two sides will be the supports for the other two, so they will need to be about an inch and a half longer than the actual measurements of the counter itself in order to account for the width of the melamine particleboard.
Hold the pieces together using your clamp and drill a couple of holes 12 inches apart, the use coarse-thread screws to hold the mold together in one piece. You can use your silicone caulking material in the corner joints and around the edges to seal. Smooth over the silicon to remove any excess and work it into the joints.
Clean, Seal, and Reinforce the Mold
Place your remesh material inside the mold, measure 2 inches from the edges, and cut it to fit. You’ll use this in a little while.
The bottom of your mold is going to be the top of your counter, so keep it clean and free of imperfections or adulterants as they will show in the final product. Clean up the mold by removing any excess and wiping down any silicon around the edges. Wipe down the inside of the mold with rubbing alcohol.
Mix and Pour Your Concrete
Now it’s time to mix the concrete. It won’t harden very quickly, but you can’t walk away from this project and come back to it, either, so ensure that you have enough time to do this all in one go.
Start mixing your concrete to the consistency you need to easily work it without it crumbling or falling apart. Go ahead and add any colors and pigments that you want to use at this time, too. Mixing by hand is a strenuous job, so you may want to look into a small concrete mixer to help get the job done without breaking your back.
Our materials list calls for high-strength concrete, which will ensure that your countertops can endure the stress of heavy-duty kitchen use. There are mixes that claim to be optimized for countertop concretes, but these aren’t necessary as long as you have a good high-strength mix.
Scoop or pour the concrete in your mold. Fill the mold about halfway up. Remember that remesh we cut in the last step? Place that right in the center on top of the concrete you just poured. Remember that it should be 2 inches from the edges on all sides. Then, pour more concrete, allowing the mixture to set naturally. Do not press on the concrete to try and help it settle. If compressed, it will eventually expand as the countertop cures destroying your work and potentially damaging your cabinetry.
Once filled, use a straight piece of wood or the edge of your trowel to level off the top. You want to flatten the hills and fill the valleys, so you may need to add more concrete and scrape again.
Remove Bubbles and Smooth the Concrete
Use a float tool to smooth out the surface. In order to work out air bubbles, use an orbital sander with no paper around the sides of the mold. You can also gently tap around the outsides with a mallet. As you see any bubbles rise to the surface, use the float again to smooth out. Keep repeating this process until there are no more air bubbles appearing.
Once the concrete begins to harden, use your finishing trowel to smooth over the surface. While this is the bottom of the counter, it must be smooth in order to stay level.
Cover and Cure
Cover over your concrete mix with a plastic sheet to protect it from dust and debris while it dries. It will take anywhere from a few days to a week depending on your concrete mix and how much time you have to dedicate to your project.
Remove the Mold
Now that the mix is dry, take the screws out of the mold. Using a putty knife and a hammer, gently pry away the sides of the mold a little bit at a time. While the concrete is very tough, you want to work slowly to avoid damaging the edges of the new counter. Have a buddy lift up the counter while you remove the particleboard. Now flip over your counter so that you can work on the top of it.
Sanding and Sealing
Use coarse-grit sandpaper with your orbital sander to sand the countertop and the sides. If you find any air bubbles at this point, you can mix a small slurry of concrete (with the same pigmentation) to fill. Then, with rubber gloves, use your hands to rub this mix over the whole surface of the counter. This will help you fill in any cracks and gaps.
Let this dry and sand again with the orbital sander, then sand by hand with a medium-grit and finally fine-grit sandpaper. Use a vacuum to pick up any dust and debris, and wipe clean with a cloth. Finally, apply a food-safe concrete sealer to finish your countertop. Allow this to dry according to the sealer’s instructions, and you’ll have a brand new finished concrete countertop.