All quality woodworking begins with ‘4-square’ lumber; lumber in which both faces and both edges are flat, perfectly square, and parallel to one another.
Lumber can be milled several different ways, but by far the easiest and most efficient is to use a power jointer and planer. (Hand-milling is a beautiful art on its own, and is something that all woodworkers at some point should try and master). Here's an example of what we mean:
Most woodworkers will at least be familiar with the terms jointer and planer, but may not be sure of the exact distinction between the two. (A lot of times you may even hear people referring to the tools as a jointer/planer; this is incorrect. They are two separate, completely distinct tools).
So what’s the difference between a jointer and a planer? In this article, we’ll talk about what each tool does, and go over the specific jobs of both.
Quick Looks: Top Picks
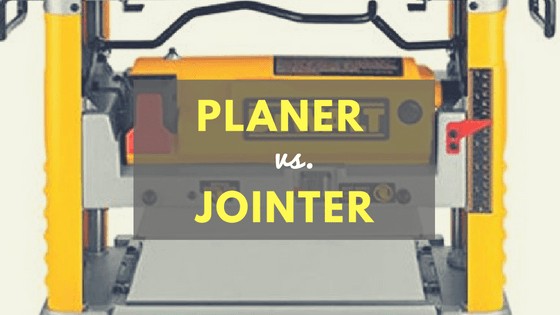
[sc name="Planer vs Jointer"]
General overview: Jointer vs. Planer
Both jointers and planers are big, expensive power tools that only serious woodworkers, craftsmen, or dyed-in-the-wool DIY’ers will consider investing in. Like we mentioned, quality woodworking can’t begin without properly milled lumber, and these tools are the most reliable, foolproof way in which to 4-square your stock.
Given their price tags and space that they take up in the garage, though, a lot of people wonder whether they can get away with buying one tool or the other. We get the same questions time after time from friends and readers; do I need both a jointer and a planer? Or, can i use a planer instead of a jointer?
In a sense, no you do not need both a jointer and a planer. (Not any more than you need both a table saw and a circular saw). However, unless you’ve mastered the art of hand-milling, the only way to ensure of 100% square, co-planar lumber is to use both tools. You can get darn close using just a planer and a table or circular saw, (and a lot of talented DIY’ers and woodworkers do this), but it’ll never be perfect.
Jointers vs. Planers: What do they do?
For a completely raw, unmilled piece of lumber, the jointer is used first to give the piece one flat, square face and one flat, square edge.
However, this isn’t as easy as simply tossing the piece on the table and giving it a once-over; you’ve got to have a keen eye for detecting the natural cup and grain direction of the stock, as these will determine which side of the board is jointed first, and which direction it needs to run along the jointer table. (Jointer blades spin clockwise, and you always want to cut ‘with’ the grain).
So, if done right, the jointer will leave you with one perfectly flat face and one perfectly square edge. (You always want to joint the face first; the jointer will only give you a perfectly square edge if the face is completely flat and flush against the fence).
What about the other face and edge?
This is where the planer comes in; it makes sure that both faces and both edges of the board are parallel with one another, or co-planar. (If you were to use the jointer for both sides of the board, you’d get two perfectly flat faces, sure, but they wouldn’t be parallel to one another - you’d be left with a wedge-shaped board that’s thicker on one end than the other).
So going back to the question of whether or not you can get away with using one tool or the other, you’d be much better off using just the planer than just the jointer.
Actually, truth be told you can do quite a lot using only a planer. Most lumber that you’ll buy will already be somewhat milled - that is, it’ll usually be somewhat flat and acceptably (not exceptionally) straight. With the planer, you can run passes on each face of the board until you get two square, parallel sides with the exact thickness that you want. You can’t square the edges with the planer, but you can use a table saw or circular saw to trim them and get fairly acceptable results. With a jointer, all you can really get is one flat face and one square edge.
Here’s a really great video showing the basics of how to use both the jointer and the planer, and highlighting the basic functions of each one.
Looking to buy?
If you feel you’re ready to up your game and make the investment on a jointer or planer (or both), here’s a short list of a few that we feel are good value buys - reliable, quality tools that you can trust to give you good results. (Remember, if you’re only going to buy one or the other, definitely go with a planer first - you can do a lot more with it by itself and you can always add a jointer down the road).
Planers
DeWalt DW734 12 ½” Portable Benchtop Planer

Last update on 2024-01-28 / Affiliate links / Images from Amazon Product Advertising API
This is probably the most popular option out there for non-professionals. It’s an incredibly reliable tool, it performs well, and most importantly for DIY’ers, it costs a tiny fraction of the more expensive, industrial-quality planers out there that will set you back thousands and thousands of dollars. It has a maximum depth of cut of ⅛”, and it can plane lumber stock up to 33 ½” long, 6” deep, and 12 ½” wide. A super convenient, user-friendly machine that’s perfect for the DIY garage.
Makita 2012NB 12” Planer
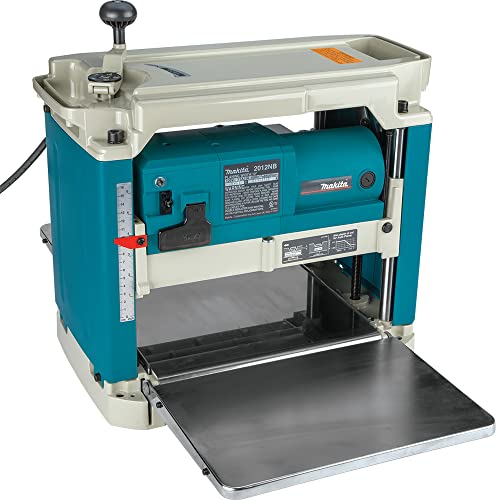
Last update on 2023-04-22 / Affiliate links / Images from Amazon Product Advertising API
Slightly better quality than the DeWalt DW734, but you pay for it.
For amateur garages/woodworking shops, this is probably as quality of a tool as you’ll find. It’s got a maximum thickness of 6 3/32” (just a tad more than the DeWalt), and a max width of 12”. It’s 2-knife cutterboard (the DeWalt has a 3-knife) is easily adjustable/replaceable, and it can support pieces up to 30 ⅜” long.
The DeWalt can handle slightly longer and wider boards, but in our experience the quality of cut is better with this Makita.
Delta 22-555 13” 2-Knife Portable Power Planer
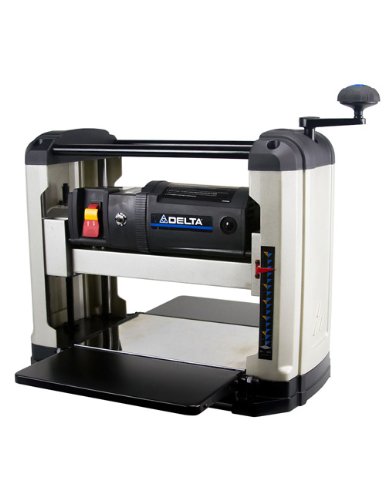
Last update on 2022-08-23 / Affiliate links / Images from Amazon Product Advertising API
Our choice for an inexpensive value option. If you’re really looking to add a planer to your workshop but budget is a big concern, we don’t hesitate to recommend this Delta. If you’re only able to spend a lesser on a planer you should already accept the fact that you’re not going to get the best tool in the world, but we’ve used similarly budget-priced planers before and this one seems to be the best option. It can take stock up to 13” wide and 6” thick, and has an infeed table support of 6 ¾” and an outfield support of 13”. What we like best about this tool is how user-friendly and no-frills it is; incredibly simple to adjust, maintain, and operate.
Jointers Ridgid JP0610 6 ⅛” Jointer

Last update on 2024-01-31 / Affiliate links / Images from Amazon Product Advertising API
A really great tool that Ridgid has discontinued - as is often the case with big power tools like these that have been discontinued, their ‘new-in-box’ price jumps up after they’re no longer available. This is kind of absurd and unfair to the consumer, but we had to include this one on here because it really is a great product - better performance-wise than the other models listed below. It’s got a 6x18” bed and an adjustable fence with stops at 45, 90, and 135-degrees for beveled edges.
Jet JJP-10BTOS 10” Jointer
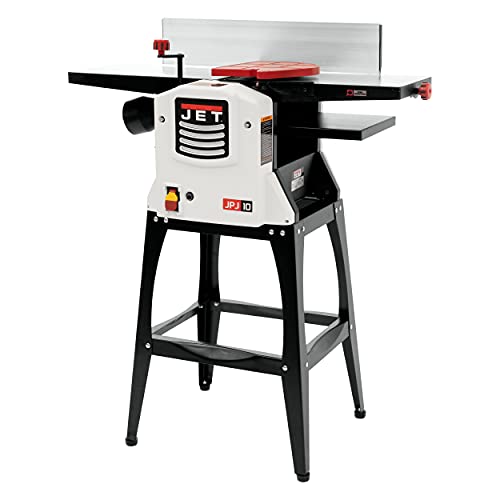
Last update on 2022-01-26 / Affiliate links / Images from Amazon Product Advertising API

The biggest ‘budget’ jointer out there that we know of. (Most amateur home garage planers are 6 or 8”). Again, make no mistake about the price - you get what you pay for. While a serious professional woodworker would never consider this for his shop, it’s a great value buy for DIY’ers looking to add a decent size planer to their shop. For a litte bit less, Jet also has the 8” JJP-8BT. Both are quality options that’ll get you set up with a jointer for a relatively minimal price.
The most value-priced of the bunch, at just a tad over $300. Again, just like their planer, Delta seems to have a knack for making incredibly simple, no-frills tools that are unintimidating to the average user. Adjustable fence for beveled cuts of 45-degrees, and a maximum depth cut of ⅛”.