Oil-based polyurethane varnish is shiny and beautiful and truly brings out the outstanding inherent properties of the wood on which it is being sprayed on. However, it is one of the most difficult types of varnish to apply.
In this video, watch Darbin Notes who how to spray polyurethane for faster, mess-free coverage on your next wood project.
» COMPARE: Best Polyurethane for DIY Projects
Obviously you’ll need an HVLP spray guy in order to follow these steps. Click here to buy the kit on Amazon.
Table of contents
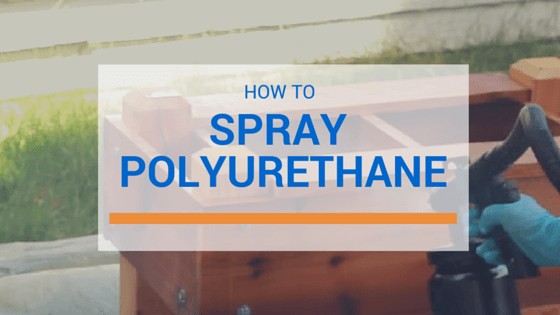
How To Spray Polyurethane Like a Pro
Below you’ll find a summary of the essential steps and then you will know how to spray polyurethane like a professional in no time at all.
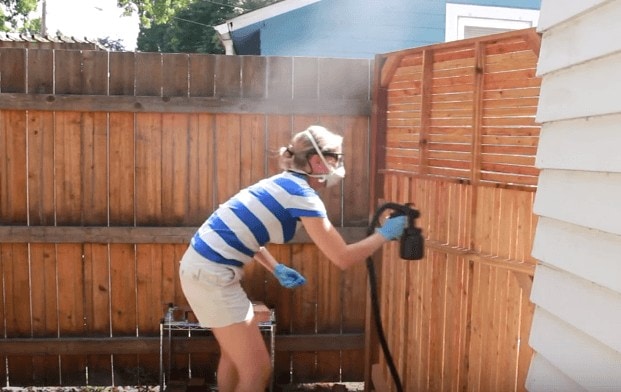
You must have some patience, discipline and work in an area that is well ventilated and free from dust. Polyurethane has a strong smell and ventilation is important for you to work in a comfortable environment
Proper Sanding Is Essential
Varnish, no matter what kind, requires a smooth surface in order to look good. You must therefore sand the surface of the wood with sandpapers that have progressively finer grit. Start off with a 100-grit sandpaper, followed by one with 150-grit and finally use one with the extra-fine 220-grit.
Sanding Sequence
- Start with 100 grit sandpaper for the initial sanding
- Move to 150 grit and sand again
- Finish with 220 or extra fine grit sandpaper
When done with the sanding, you need to carefully examine the surface looking for any scratches and blemishes that may have been caused by the coarser grits. Once satisfied with the smoothness of the wood, then you can wipe the surface with a tack cloth, to clean it of all traces of dust or trapped insects and grime.
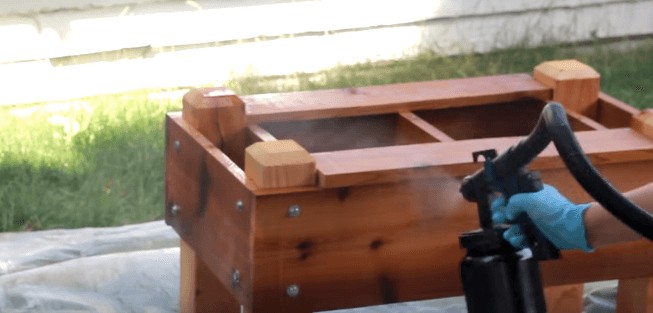
Simple Spraying Techniques
- Spray at a consistent angle, not an arc rotation
- Overlap slightly, like painting with a brush
- Spray a light coat – better less than more to avoid drips
- Wait 48 hours between multiple coats
Spattering is one of the most common blemishes that you find when polyurethane is applied improperly.
When you push the button of the sprayer, like the HVLP sprayer used in the video, large drops of varnish will be emitted before the fine spray, and these form unsightly spatters. You have to start spraying before you reach the edge of the wood, and continue well past you have reached the end, allowing you to apply the fine spray on the wood, and the spatters on the floor of your work space.
Getting the Spray Angle Right
Many people believe that spraying in an arc will give the best result, but that’s not really the case. When you spray in an arc, you get more coverage at the center of the surface and less at the edges. You have to move the can over the surface of the wood at the same angle. Move your full arm, instead of swinging the can in your hand.
In order to get a good, even coverage, you have to overlap the spray pattern just like you would if you were using a brush. The overlap should spread to at least halfway over the previously sprayed section. This ensures that there is no huge deposit at the edges of the overlap. When you overlap at least 50%, you end up with an even finish in the end.
In order to build even coats, you have to keep the tip of the spray can at an even distance from the surface of the project and move the can at an even speed. As a rule of thumb, you just need to spray enough polyurethane to wet the surface of the wood. This stops the development of runs; it is better to apply several thin coats, rather than have thick coats, since these lead to the formation of runs.
When you have a large project, your finger may end up getting sore and tired, and this may lead to some uneven spraying patters. Buy a spray handle from the store, which allows you to use all your fingers. Using such a handle gives you better control over the spraying and saves your finger.
Don’t Try to Cover in One Coat
If you have stains on the wood, you should first use a mist coat, rather than try to cover it up with a thicker layer of polyurethane. The solvent used to thin the polyurethane in the aerosol container can dissolve the stain, and this will bleed and make the project look murky. If there are any blemishes and runs, you should gently remove them using a sharp razor blade, ensuring that you do not make any deep cuts.
You should also wet-sand the surface to ensure that even the most minuscule of bumps has been removed; use a fine 220-grit sandpaper. Wait at least 48 hours before you apply the final coat and another 48 hours before you polish the surface.
Resources
http://www.thisoldhouse.com/toh/photos/0,,20414984_20833310,00.html