Knicks, dings, chips, gashes, and holes in the drywall are an inevitable part of home-owning. Fortunately, repairing these holes and imperfections is a breeze with a decent putty knife and a quality spackle.
Whether it’s a massive hole or a tiny chip in the paint the size of a pencil eraser, size will be the one thing that determines how you go about tackling drywall repairs. In this article, we’ll break it up into small, medium, and large-sized repairs.
Fixing Small Holes
A small repair would be considered anything that you can’t fit a finger into. A common example would be plugging up screw holes or drywall anchors, where a TV or shelf may have been mounted on the wall.
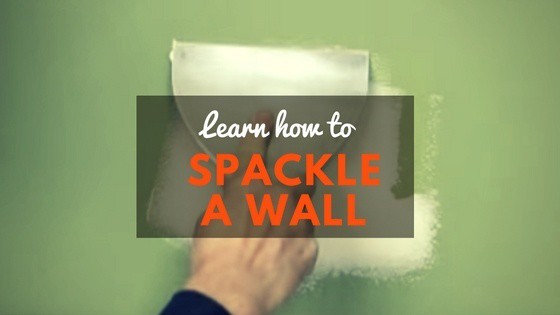
For these repairs, the only thing you’ll need is spackle and a putty knife. Before you begin the repair, clean up the hole and lightly sand the area with a 100-150 grit sandpaper.
Next simply glob an appropriate amount of spackle onto the area, and smooth out with the putty knife. The key to doing a quality job is patience. You’ll want to do probably at least three layers of spackle, and this requires waiting for each layer to dry before adding on another.
Plug up the hole as best you can with the initial layer, and allow it to dry. Don’t try and finish the job with one application of spackle. When the initial layer dries, the hole will be plugged but you’ll still be left with a small indentation. Add additional layers of spackle and feather out with the putty knife until the area is entirely smooth and flush with the surrounding wall.
If you’ve never worked a putty knife, don’t be afraid to be deliberate with it - you’re not painting a watercolor. Get a good firm hold of it, and apply firm pressure as you spread the putty, making sure to keep the edge of the knife flush against the wall at all times.
When your final layer of spackle has dried, sand the area with a 180-grit sandpaper before priming and painting.
Fixing Medium Size Holes
A medium-sized hole would be anything from about 4-inches in diameter, down to the size of your fingertip. A good reference for this size repair is the all-too-common doorknob hole.
For these repairs, a patch will be needed. Adhesive, aluminum mesh patch kits are the best option. They come in a range of sizes, are incredibly simple to use, and are available inexpensively at any hardware store.
As with the smaller holes, clean up the area before you begin your repair. Smooth out any edges and lightly sand the area with 120 or so grit sandpaper to ensure that the adhesive patch sticks well to the wall.
Once prepped, simply peel off the adhesive pack of the patch, stick it over the hole, and smooth out onto the wall. Here’s a video showing how easy it is to use these patch kits.
Once the patch is on, then you can go ahead and start applying your spackle. Again, be deliberate with your putty knife to ensure the best job. You’ll want to do multiple coats for the best results. Once complete, sand the spackled area with 180 or so grit sandpaper before finishing with primer and paint.
Fixing Large Holes
For large repairs, you’ll need to cut out the damaged area with a sheet rock saw or a good utility knife, and plug it up with a piece of new drywall.
Let’s assume you’ve got a ragged, irregular-sized hole about 5” long and 3” across in your wall. Use a level to mark off a square or rectangle around the damaged area, and use your utility knife or saw to cut the area out.
Once the area is cut out, you’ll need to cut a new piece of drywall to fill the hole with. You’ll cut the new piece larger than the hole on the wall. For reference, let’s say you cut a 6” x 4” rectangle around the damaged area on the wall. You’ll want to measure and cut out an 8” x 6” piece of new drywall, to use as a patch.
When you’ve got this new piece cut out, measure and mark a 6” x 4” rectangle inside of it. Now comes the important part. You want to score out this 6” x 4” area, but leave the drywall paper on when you snap it off.
In other words, when you’re done you should have a 6” x 4” rectangle cut out on your wall, and a 6” x 4” piece of new drywall cut out with 2” of excess paper sticking off each side. The excess paper will serve as tape to hold the patch in place when you put it in the wall.
When you put the patch in, make sure to spackle on both sides of the paper to ensure good adhesion to the wall. Once the patch is ‘taped’ in, then you can go ahead and spackle over the entire area until it’s flush with the surrounding wall. Here’s a good video showing this whole process in action.
Make sure to lightly sand the spackled area with 180 or so grit sandpaper before you apply paint.