If you are remodeling your kitchen, you may have considered installing a subway tile backsplash to give the room some texture and make it more visually appealing. If this is the route you want to take, you have the choice of whether you are going to contract out the work or do it yourself. For the do-it-yourselfer, installing subway tile yourself can save you a lot of money, and you will still be able to have the same professional results. Here’s how to install subway tile backsplash with video instructions:
Step 1 – Gather your tools and material
Tools needed:
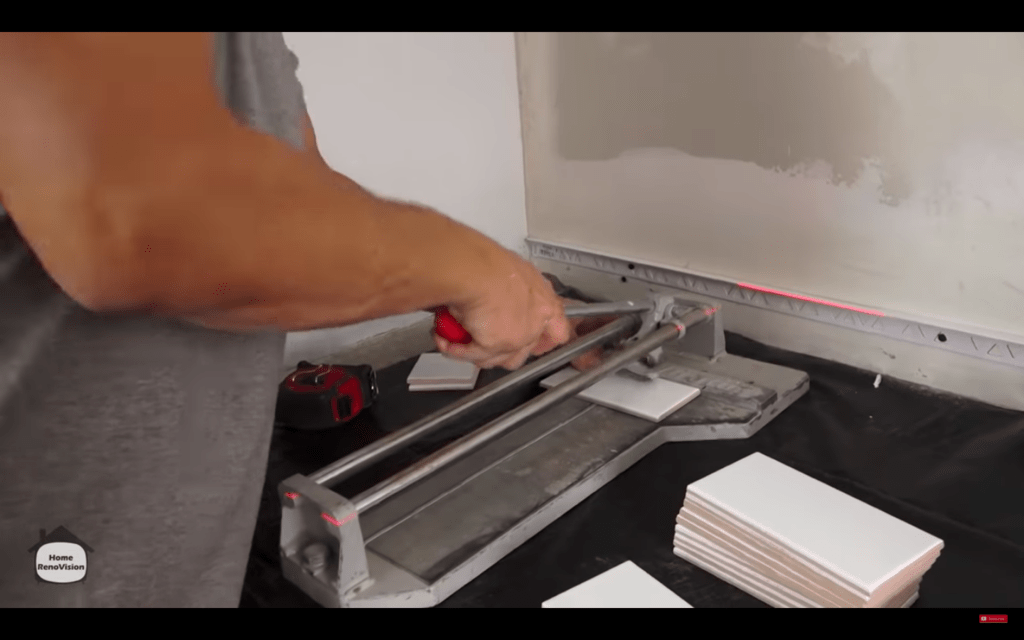
- Tile Cutter
- Grinder
- Marker
- Screwdriver
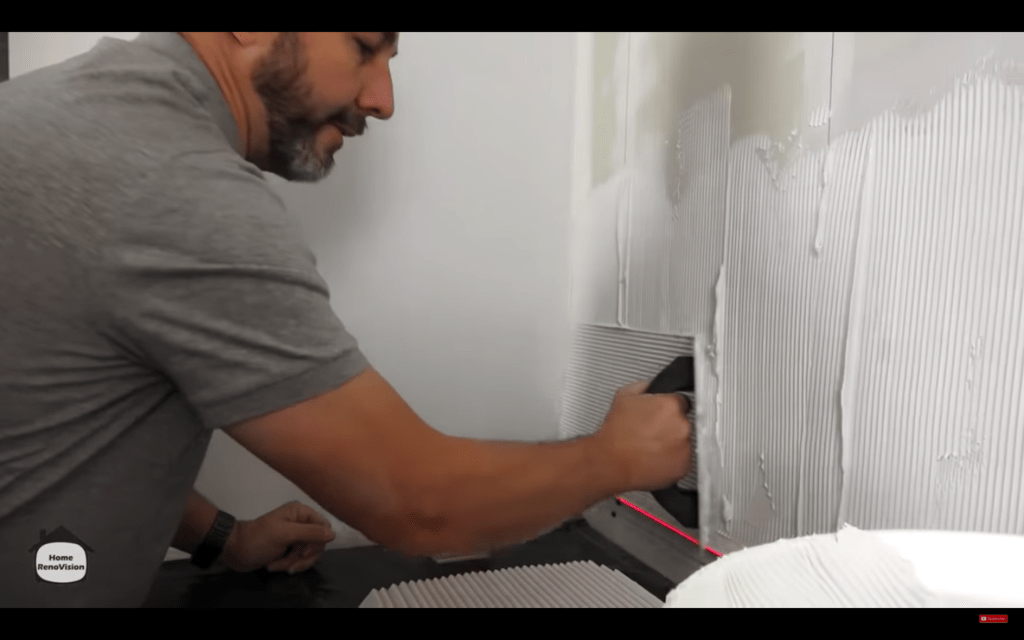
- Serrated Trowel
- Laser Level
- Straight Edge
Materials needed:
- Your choice of tile (marble, stone, glass, quartz, limestone, granite, slate, etc.)
- Tile Adhesive
- Spacers
Step 2 – Set up a level surface
To start, you need a level surface to build off, and this is true whether you are using stone or glass tiles. It is essential to get this precise and not to trust the levels of existing walls or countertops. Set up a tile on the corners or both extreme sides of the counter and run a laser level between the top of the two tiles. Use this as your guide to temporarily attach a straight edge to the wall. This is the surface you will use to stack your tiles, and then you can come back at the end and run the bottom row of tiles. Remember, you will be caulking the bottom seam, so any cuts that need to be made will be covered up.

Step 3 – Pre-cut half tiles
Subway tile is typically staggered by halves from one row to the next. Before you get started applying tiles, cut enough in half to account for every other row from top to bottom on one side of the kitchen.
Step 4 – Spread Adhesive
Start in one corner of the kitchen and start spreading your adhesive. Remember, less is more. Make sure to leave good clean grooves from the trowel. Only spread and cover an area you can do in the set time of the adhesive, usually around 10 minutes.
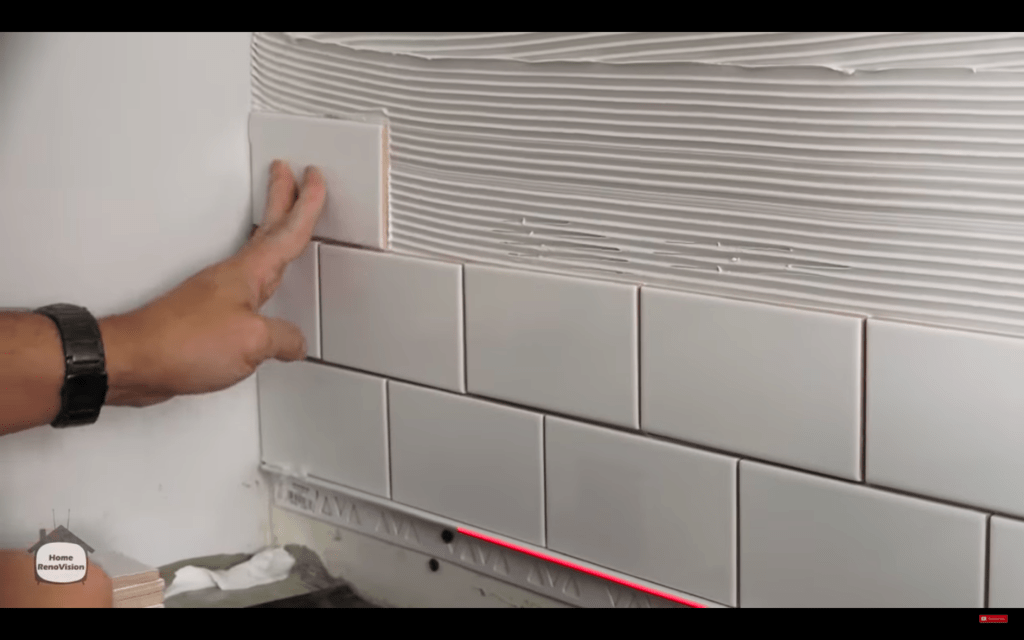
Step 5 – Rough Tile Set
Now it is time to start setting your tiles on the wall. Start in one corner and work out from there. Remember to use your half tiles to stagger the rows. It is important to keep everything as clean as possible to minimize the cleanup at the end and to have the best results. When setting tile, estimate the spacing between tiles and put a bunch on the wall. As you set them, put them in tight against the other tiles and then spread them apart to prevent the glue from bunching up.
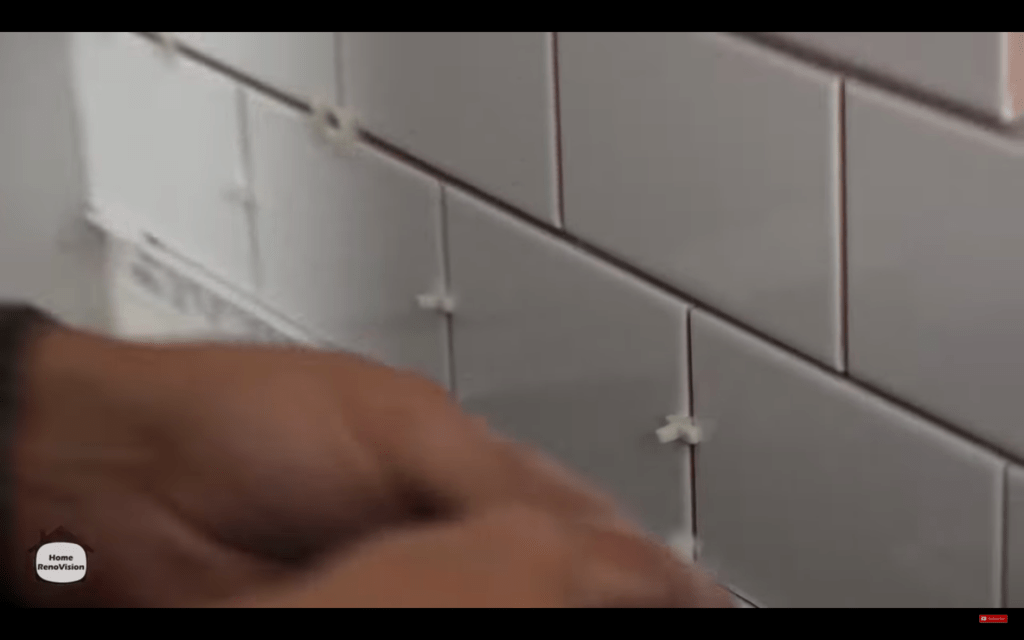
Step 6 – Install Spacers
Once you get a good number of tiles set, come back and add in your spacers. Remember, this all has to be done before the adhesive dries, so work in management groups of tiles. Set one spacer between each end of the tiles in each row. Set two spacers under each tile to separate the rows. Continue this on all of the tiles.
Step 7 – Dealing with wall sockets
At some point, you will have to work around an obstacle, such as a wall socket, or in some cases, a pipe. When doing so, remember to leave some spacing for the electrician to work. It is also important to reset your offset on the other side of the obstacle. Mark the halfway point of the first whole time on the other side of the socket and line it up with the grout line. Make sure any space you leave will be covered up by the plate around the socket.
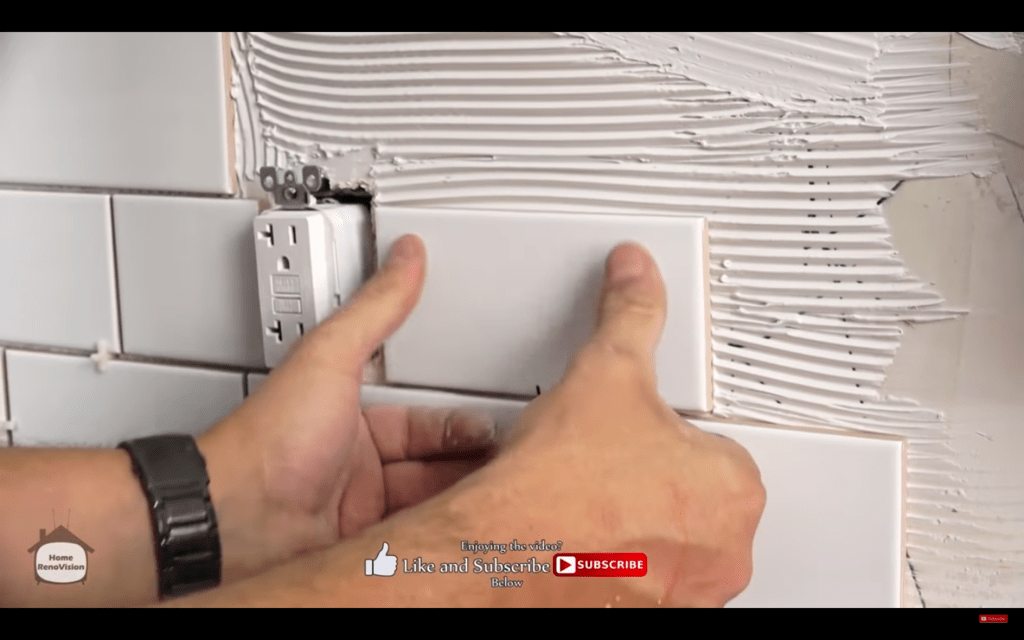
Expert tip – When working in tight spaces around electric sockets, it can be easier to apply the adhesive to the tile instead of the wall.
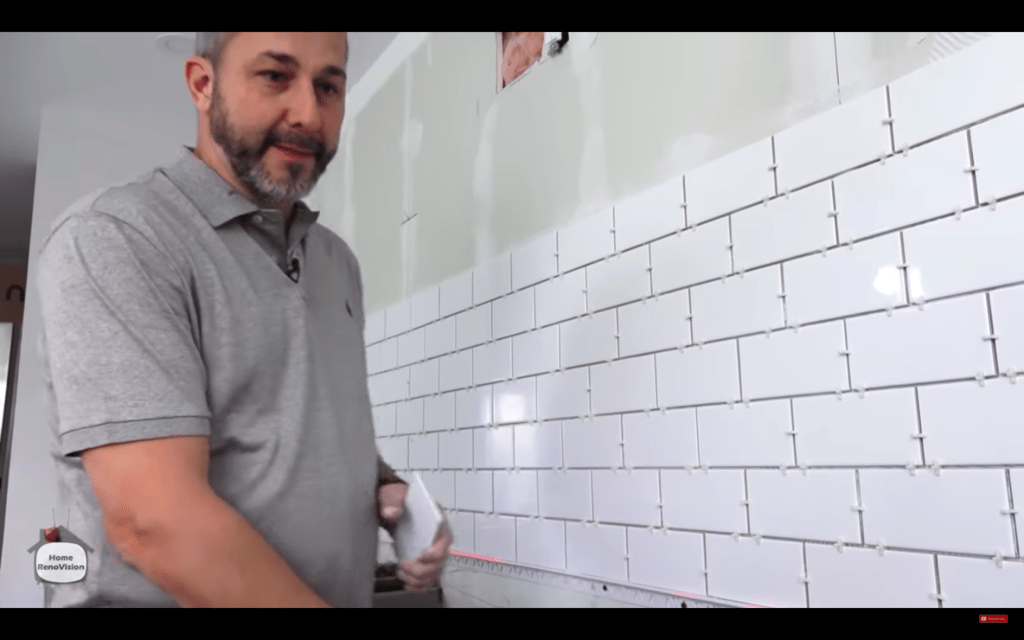
Step 8 – Continue until finished
Maintain this process until you have covered the desired area. This could be the entire wall or just the space under the cabinets. As long as you have a level starting point, maintain clean spacing, and don’t let the glue dry, you should find yourself with a beautiful backsplash when complete.
To see more and watch a pro install some tile, watch this video!