Most homeowners go their entire lives without ever having to worry about their aluminum downspouts. But, if you find yourself in the unlikely situation where you need to replace or repair it, you’ll need to know how to cut downspout.
While you may be nervous or uneasy about tackling this project yourself, try not to worry. This easy to follow guide will help put you at ease, and in no time you’ll be a pro at cutting downspout.
What You’ll Need
Fortunately, this is a job that doesn’t require a lot of tools. You’ll be able to get the job done quickly and easily with just a few supplies.
- Aluminum downspout
- Ladder
- Tin snips, or a jigsaw with a metal cutting blade
- Downspout crimper
- Downspout straps
- Drill
- ¾” self-tapping screws
- Carpenter’s pencil
- Tape measure
- Safety goggles
- Gloves
Step I: Measuring
Your first order of business will be to measure for your project. Once you know how large you need the piece of downspout to be, you can mark your measurement on the downspout with a carpenter’s pencil.
If you’re simply replacing a damaged downspout, you can remove the damaged one and use that as a template for the new downspout.
If you’re unsure about how much downspout you need, or if you’re tackling some gutter work in addition to the downspouts, This Old House may be able to help you out with their guide.
Step II: Cutting the Downspout
Now, we’ll cover how to cut downspout. Cutting downspout is easy, and you can handle all the cutting with a simple pair of tin snips. Or, if you have a jigsaw with a metal cutting blade handy, you can get a perfectly clean cut with the jigsaw.
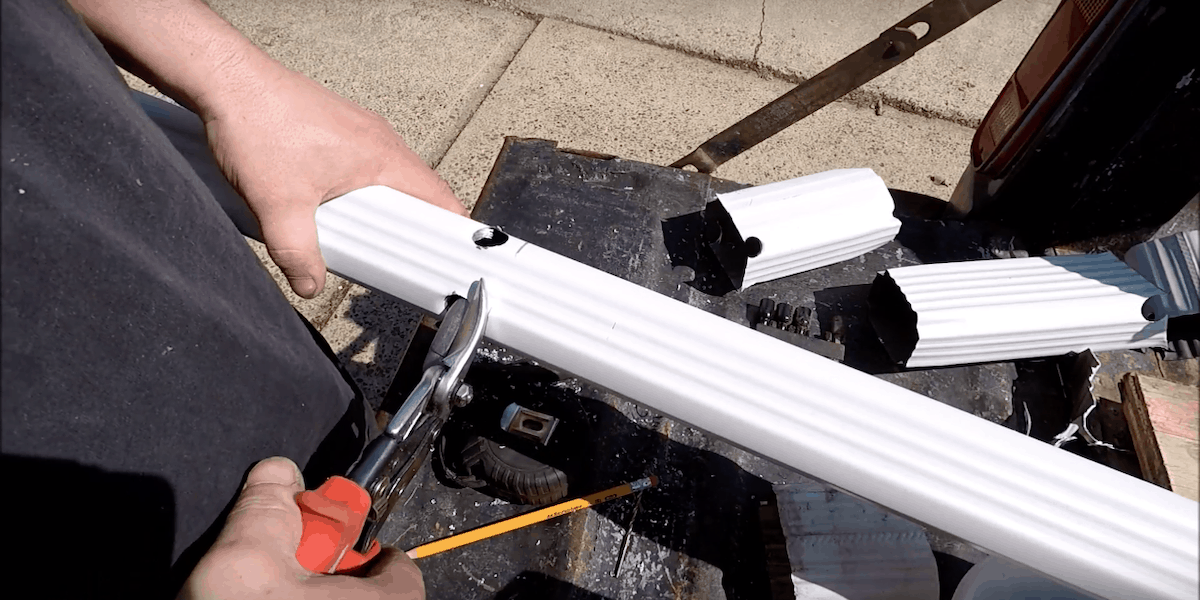
If you’re using tin snips, you’ll want to use one of shears to poke a hole in the downspout along the line you’ve marked when you measured. Then, work the tin snips through the downspout and cut along the line until you’ve completely cut through the downspout.
This method doesn’t produce the cleanest results. But, since your cut downspout will be going into a prefabricated elbow, you’ll be able to hide any jagged edges inside the elbow. So, you won’t have to worry about your finished product looking less clean.
Your other option for cutting the downspout is to use a jigsaw outfitted with a metal cutting blade. I recommend this method if you have a jigsaw handy because it will result in the cleanest cut. A hacksaw or coping saw also do the job just fine in a pinch.
As always, before working with any power tools, make sure you’re wearing gloves and safety goggles. You may also want to consider hearing protection. Whenever I’m cutting metal, I wear long sleeves and pants, so I don’t have to worry about getting any metal splinters.
Whenever I’m cutting a downspout with a jigsaw, I like to position the downspout over two sawhorses. Then, I’ll have a helper hold the downspout steady while I’m cutting. That way, once the cut is finished the excess portion of downspout will simply fall to the floor.
Step III: Crimping the Downspout
To make your downspout fit nicely inside the elbow, you’ll want to invest in (or borrow) a crimping tool. Without a crimper, you’ll end up crushing or deforming the end of your downspout to get it to fit. The crimper helps ensure you’ll end up with a polished finished product.
By crimping each corner of the downspout with a crimping tool, you’ll create an end that fits snugly inside the elbow, which creates a polished finished look.
Step IV: Attaching the Downspout
Next, you’ll need to attach the downspout to the elbow that extends downward from your gutter.
Climb the ladder and work the downspout into the elbow. Once you’ve completely secured the downspout inside the elbow, secure the downspout and elbow by driving a self-tapping screw through both the elbow and downspout on either side.
Next, you’ll need to install an elbow at the bottom of your downspout for proper drainage. Fit this elbow into the bottom of the downspout and secure it with self-tapping screws, as you did with the top elbow.
Secure the downspout to the exterior of the house using downspout straps. You’ll be able to pick these up online or at any local hardware store. Use one strap every eight feet or so.
Depending on the material the exterior of your home is made from, the protocol for attaching the downspout straps will vary. Consult with someone at your hardware store if you’re unsure of the best way to attach these straps to your home.
Once the straps are attached, wrap the straps around the downspout and drive a self-tapping screw through the straps and into the downspout.
Final Word
If you were unsure of how to cut downspout before today, you aren't alone. Most DIYers have never had to tackle a project like this. Fortunately, cutting downspout is easy and straightforward. Now that you have a bit more information on how to tackle this project, you should be able to cut downspout like a pro in no time at all.


Somewhat helpful but poor lighting and the fact that some of the most important parts of the shots are covered by the title and website bar at the bottom (like when he is cutting the downspout at the 1:45 mark) makes me give this video a thumbs down.