Whether you’re looking for a great project to complete with the kids, or you’re just trying to give your feathered friends a place to hang out, building a birdhouse is a great addition to your yard. Today, we’re going to cover the basic ins and outs to show you how to build a birdhouse.
Table of contents
Supplies You’ll Need
When it comes to supplies, building a birdhouse can be as easy or as complicated a project as you’d like to make it. You can build a simple birdhouse with a single piece of wood, or, you could architect a wildly opulent mansion for your bird buddies, which would obviously involve more materials and tools.
A word on materials: Feel free to make the birdhouse out of whatever you had on hand. If you’re going to pick up wood specifically for the project, we recommend cedar or redwood, as they’re both weather resistant. Any wood will do, provided the wood is untreated.
Here’s what you’ll need:
- Wood of your choice (1×8 or 1×12 cedar board is our favorite)
- ¼” wooden dowel
- Wood glue
- Carpenter’s pencil
- Scrap cardboard for pattern
- Ruler or square
- Protractor
- Miter saw
- Nail gun or hammer
- Drill
- 1 ½” Forstner bit
- ¼” drill bit
- 3/32” drill bit
- 2” finishing nails
- Exterior paint or stain
Step I: Planning Your Birdhouse
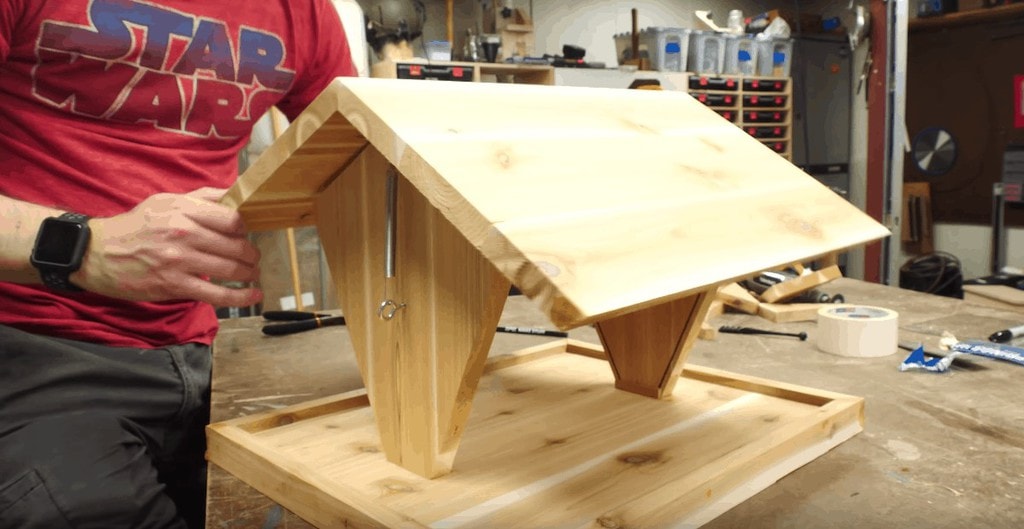
The most important component of a quality birdhouse is a solid plan. Feel free to use your imagination and create scratch blueprints for an extravagant birdhouse if you like. For our purposes today, we’re going to construct a basic birdhouse from simple plans.
Using some cardboard, a protractor, and a ruler or square create a pattern for your birdhouse starting with the front and back. Keep the dimensions of the board you’re working with in mind when you’re creating your pattern to ensure you don’t create a pattern that’s too large for your board.
For our birdhouse, we’re going for a classic shape with a narrow base that gets wider as it grows upwards. Our dimensions will (roughly) be 5” at the narrowest point of the base, 8” at the widest, and 10” tall.
Once you’ve created your pattern, trace each piece onto the board, you’re working with.
Step II: Cutting the Pieces
Now, we’re ready to cut out the pieces for our birdhouse. A miter saw is the best tool for this job. If you’re working with a partner, have them hold the board in place while you make the cuts. Otherwise, clamp the board to the table before you get started to ensure your hands are away from the saw blade.
Put on your safety equipment, and begin making each of your cuts until you’ve cut out each piece of your birdhouse. Take special care when making any mitered cuts you need to make for the roof or sides of the house to ensure that they fit together perfectly when it’s time to build the house.
Step III: Creating the Entrance and Perch
Once you’ve cut out your pieces, it’s time to add the entrance and perch to the front of the house.
First, identify the middle point of your house and mark it with a dot. This is where you’ll start your hole. Next, attach a 1 ½” Forstner bit to your drill, and drill out the hole on your mark.
Now you’ll need to find the center of where you want your perch to be. Measure across the front of the birdhouse at the height you’d like the perch to be and mark it. Replace the Forstner bit with a ¼” drill bit, and drill through the wood.
Take your ¼” dowel and cut it to the length you’d like the perch to be, being sure to account for the 1” which will be stuck in the hole you’ve just drilled. Next, use a mallet to carefully hammer the dowel into the hole.
Step IV: Attaching the Pieces of the House
Now, it’s time to put the house together. Start by attaching the front and back to the base, using wood glue. Clamp the pieces and allow them to dry. Once they’re dry, drill pilot holes using a 3/32” bit at several locations along each joint, and shoot finish nails into each of the holes.
Repeat this same process with the sides of the house as well. Glue the sides on, clamp then to let them dry, drill your pilot holes and drive the finish nails.
Repeat this process one final time to attach the roof to the house.
Step V: Paint or Stain the House
Now, for the fun part! Give your birdhouse some personality with the paint or stain of your house. You can also leave your house unpainted, although it may not age as well as a finished house. Either way, it’s entirely up to you, just be sure to use exterior paint or stain.
Step VI: Mounting Your House
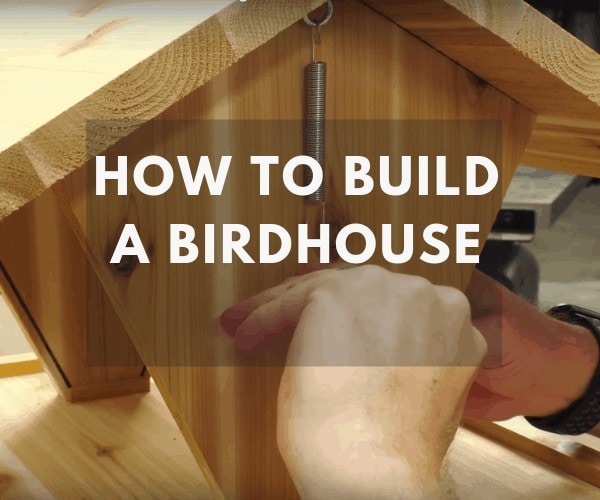
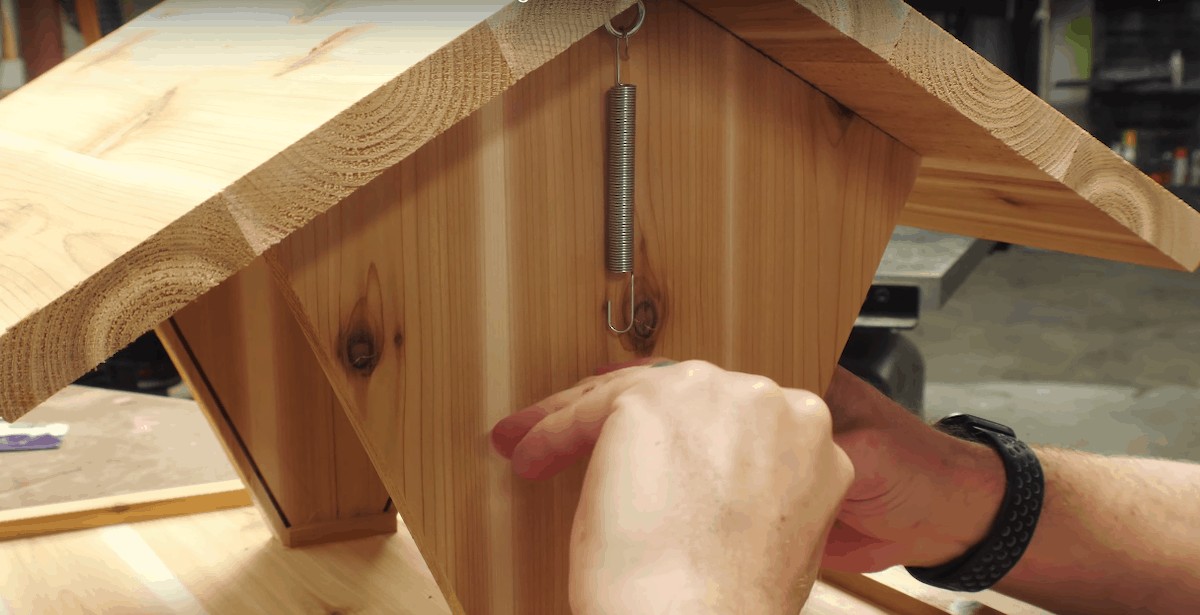
The final step to complete before the birds of the neighborhood can enjoy their swanky new digs is mounting the birdhouse. First, you’ll need to decide where you’d like your birdhouse to be located, and if you plan on hanging it, or mounting it to a fixture.
For a hanging birdhouse, add two eye hooks along the peak of the roof, and attach a loop of string or wire so you can hang it anywhere in your yard. You can also attach the birdhouse to an existing fixture, like a fence post or a tree by attaching a birdhouse hanging bracket to the back wall of your birdhouse.
Final Word
Learning how to build a birdhouse is a fun project to tackle with kids, or by yourself. The plans above should have you well on your way to creating a beautiful birdhouse. Keep in mind that we’re just trying to provide you with the basic framework, use your imagination and get as creative as you like when building your birdhouse.
Once your dream birdhouse is complete, tackle some of our other awesome DIY projects, like these pallet shelves or these bird feeders.