
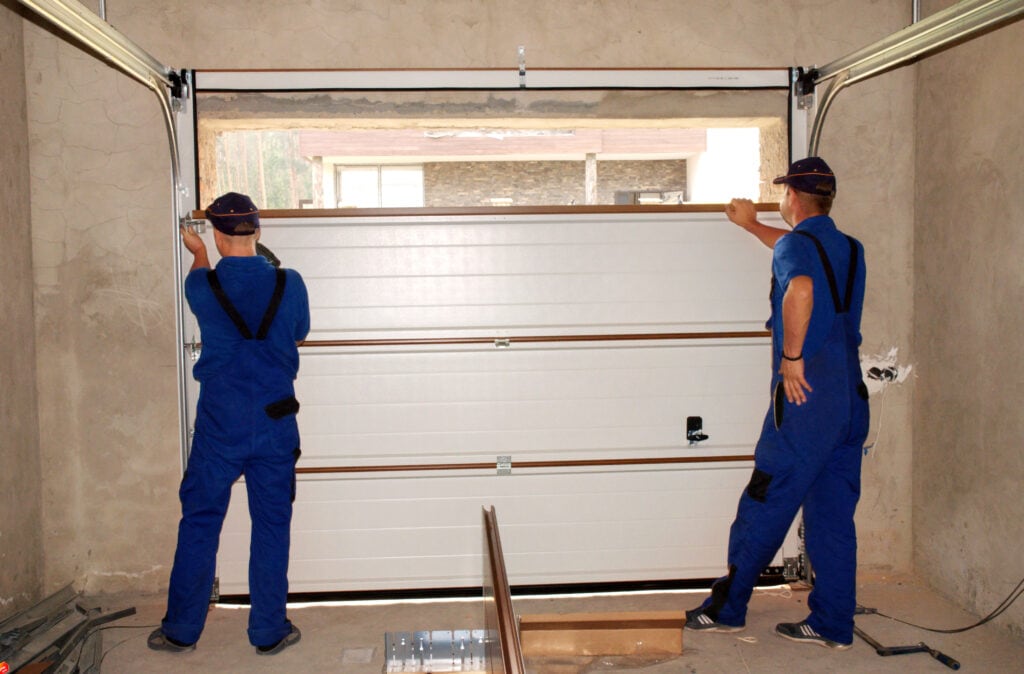
Garage doors, unfortunately, are one of the most frustrating structures to fix around the house when they stop working. They’re too big to handle in one piece, they’re heavy, and they require all sorts of hardware to work that you don’t use on a regular basis. Garage door services are expensive, and it always seems like they’re doing a job that you could just do yourself.
With a little bit of know-how, you can repair a garage door on your own, but there are a lot of things that can go wrong with garage doors that you need to know about before you get your hands dirty. Before you attempt to repair garage door panels, windows, tracks, or openers yourself, educate yourself about the different types of issues garage doors have and what you can do about them.
Table of contents
Most Common Garage Door Issues
Noisy or Squeaky Garage Door
Garage doors use bearings and wheels on tracks, and these parts can rub together and squeak obnoxiously as the door opens and closes. However, if a little WD-40 lubricant doesn’t help, all you may have to do is replace these small parts to quiet down that noisy track.
If the tracks aren’t the culprit, then maybe the door itself is. The garage door panels are connected with hinges that can also dry out and start to squeal over time. The same principle applies here as it did with the wheels and tracks. Try some WD-40 lubricant on the hinges, let it soak in, and see if the noise dies down after a few uses. If it doesn’t, then you know it’s time to change out your existing door hinges for a fresh set.
Bad Springs
The springs (called torsion springs or extension springs) in your garage door are hooked up to a pulley system that assists in raising and lowering the door with very little force, meaning that just a small motor is all it takes to open and close that enormous garage door. As you can imagine, being exposed to constant pressure as the garage door opens and closes all day, compounded with the changing temperatures in garages (which are often not climate controlled), the springs are prone to wearing out and breaking down.
If your garage door starts to open slowly or struggle to open at all, but you can hear it trying, the issue might be your springs. You might’ve noticed that when you open the garage door yourself, the springs help pull the door up into place. If you try to open the door by hand and it’s a little too heavy, it’s time to replace your garage door springs.
This is one situation where you want to call a garage door repair service. Home garage door repair is generally pretty simple, but your garage door springs are made of sharp metal that’s under pressure. There is some risk for injury when doing a repair to garage doors with spring problems. Allow a garage door repair professional from a reputable garage door installation service to perform this work for you.
Wearing Garage Door
A well-built and properly cared-for garage door should last for several decades. However, when not maintained with care, they can start to wear out and deteriorate after only 10 years or so. Particularly doors made of cheaper materials like plywood rather than stronger synthetic materials are prone to weathering and aging. Rarely, but occasionally, garage doors can even be subject to mold and rot. Nothing looks uglier on the side of your home than busted-up garage doors.
Examine your garage door for signs of wear and tear. If the paint is chipping but the material beneath it is still in one piece, you can simply apply a shiny new paint job to your garage doors to make them look good as new. But if the door itself is dinged up, badly dented, gouged, chipping, or even rotting away, then it’s time to go shopping for a replacement garage door. Your best bet is to work with a garage door installation service that can hook up your new doors quickly and safely. There’s not much you can do in the way of a garage door repair if your door is worn out altogether.
Broken Garage Door Windows
Broken glass is a safety and security problem all in one, and garage door windows are especially prone to breakage because at ground level, and garage doors are often positioned in high-traffic areas where there’s lots of activity.
Garage door windows are regularly broken by stray baseballs and hockey pucks in the driveway. They’re routinely vandalized in areas with dense populations, and many homeowners in these areas will choose garage doors without windows at all. In some cases, even wildlife can come by and wreck your garage door windows.
If your garage door windows are broken, clean up the broken glass right away and get a replacement pane of glass. You can either do this replacement yourself or hire a window repair specialist to come and help you. Replacing a garage door window isn’t that much different from replacing any other window pane in your home, so if you feel up to the task, you can save the money on a contractor to and do it yourself.
Broken Garage Door Opener
The garage door opener is every bit as sensitive as the mechanical garage door system itself, if not even more so. The garage door opener is the electronic box containing a motor that pulls the door up and down. Small motors are prone to failure for all sorts of reasons. Garage door opener failures can be either mechanical or electrical, and if your garage door opener doesn’t seem to do anything at all, it can be hard to tell if it’s a problem that can be repaired or if it’s time for a replacement.
If it’s time to replace your broken garage door opener, you could call a professional garage door repair service to help, but it’s typically a job you can do yourself. Garage door repair and installation services can get pretty expensive, but it’s also a somewhat complicated job. If you’ve got the confidence and the tools, we’ll give you the knowledge to replace that broken garage door opener and save tons of money.
How to Replace a Broken Garage Door Opener
Garage door openers have a two-way motor that powers a chain along a railway above the garage door. The chain carriage is connected to a drawbar which helps to draw the door to its open position and back to its closed position.
There are stops on either end that detect when the door has reached its open or closed position which tells the motor to stop running. Then, there’s a relay switch that swaps the direction of the circuit so that the door goes the right direction the next time you hit the button. On top of that, there’s also the radio receiver that allows remote operation of the garage door opener with a pushbutton or keypad control mounted outside of the garage.
As you can tell, there are several parts that makeup garage door openers and each one of them can fail. And once the garage door opener fails, it’s usually a good idea to replace the entire unit altogether.
Your garage door opener should be centered between either end of the door, so you’ll want to get out your tape measure to figure out where the ends of the door line up with the ceiling and where the exact center point is between them. This way, when you install the drawbar later, the door will be evenly balanced as it is guided up the tracks.
Next, raise the door to the top and mark off the spot where the top of it rests where it should stop. Then, make note of the height of the top of the door when it’s raised, since the rails must sit slightly higher than the highest point of the door’s line of travel. Otherwise, the door may knock the rails loose.
Unless you’re lucky enough to be installing your garage door opener right below a stud, you’ll need to find something to affix the opener to that’s strong enough to hold it. Take a look at the area above the center marking you made earlier. If there’s no suitable structure on which to mount the opener, you’ll have to install a mounting board.
Locate the closest studs on either side of the center where you’ll mount the door opener. Use two long screws to secure a plank to the studs over the mark where the door reaches its highest point. Now re-mark the center on the support mount plank so you don’t lose its place.
Next, while still unmounted, connect the chain to the door opener’s motor. New garage door openers will come with owners manuals that give you step-by-step instructions to make sure you know exactly how to do this correctly.
Close the garage door and lift the rail to up to the mounting plank, and connect it about two inches above your center mark. Typically, the opener will come with rail brackets you can use to easily fasten it to the mount. If it comes with nuts and bolts instead, you may need to drill holes in the mount first. If so, simply measure the distance between the openings in the bracket and mark them on your mount. Then bolt the bracket into place.
Now it’s time to install the opener itself. Bring the door opener up to the rails and line it up horizontally with them. You might want a buddy to help you, as you’ll want to also raise the garage door to its open position to check that it won’t bump into the opener assembly. Fasten the assembly to the bracket that you previously installed.
Connect the drawbar to the rail carriage and move it to where it will be when the door is closed. Note the position of the mounting screw holes for the drawbar, and mark them off on the garage door so you can drill holes to connect them together. Once you’ve done so, screw the drawbar to the carriage to the garage door, and you’re ready to test the door.
Open and close your garage door by hand to make sure that it’s on its track and stops at the right point at the top. Once you’re confident that the door is connected to the carriage rigging properly, you can connect the radio receiver and the pushbutton switch in the garage. Always make electrical connections with the power turned off to prevent serious injury.
You’ll usually need an extension cord to connect the power supply for the drive assembly. You can usually tape this up to the ceiling in a pinch, but later on, you’ll want to hang this cord in a more permanent way. Plug it all in and give it a go.
The first few times you test the new garage door, simply ensure that it starts and stops in the right place. Then, test it a few more times while interrupting the power. This will help you identify if there are any points where it locks up or gets stuck when not in motion.