So you just bought a brand new sawzall and you’re itching to do some sort of DIY wood project. Well, today we’re going to show a step by step guide to building a cool rustic wall shelf out of pallets. Pallet projects are hot right now, and this pallet wall shelf in particular has a very rustic wall shelf look that will be sure to have your guests talking.
If you need some help finding free pallets and reclaimed wood for this pallet wall shelf project, check out our article on how to find free pallets.
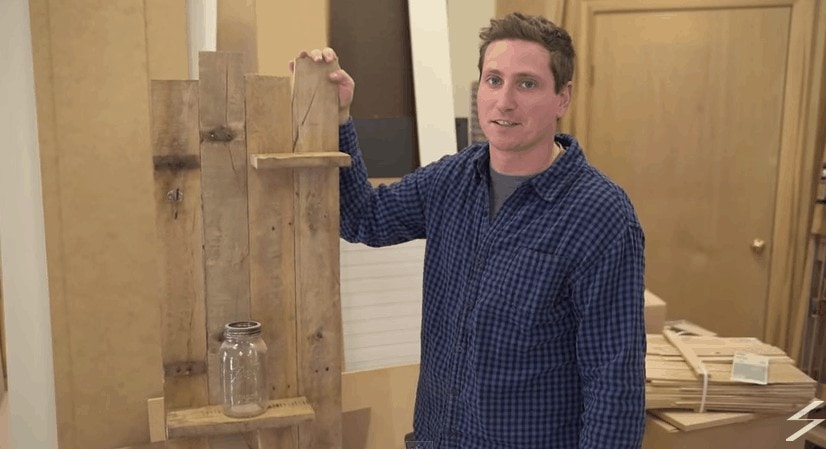
This tutorial comes from Jake Schmanke, and here is a look at the finished product:
What You’ll Need:
- Four 36 inch pallet boards
- Two thicker pieces of reclaimed wood to use as rustic wall shelves
- One rustic/vintage hook
- One thin (1 inch) board to brace the back of the pallet wall shelf
- Tape measure.
- Compound miter saw. Here’s our top rated miter saw.
- Pencil for marking measurements
- Eight 1 inch screws
- Four 2.5 inch screws
- 3/32 drill bit
Step By Step Guide:
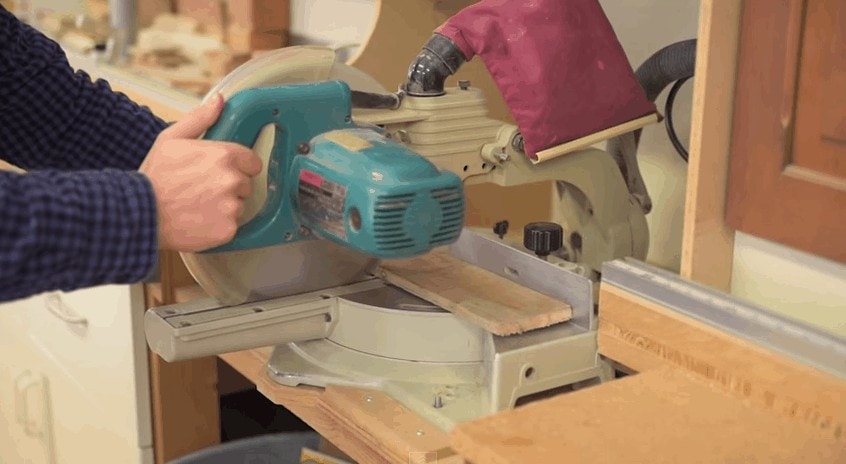
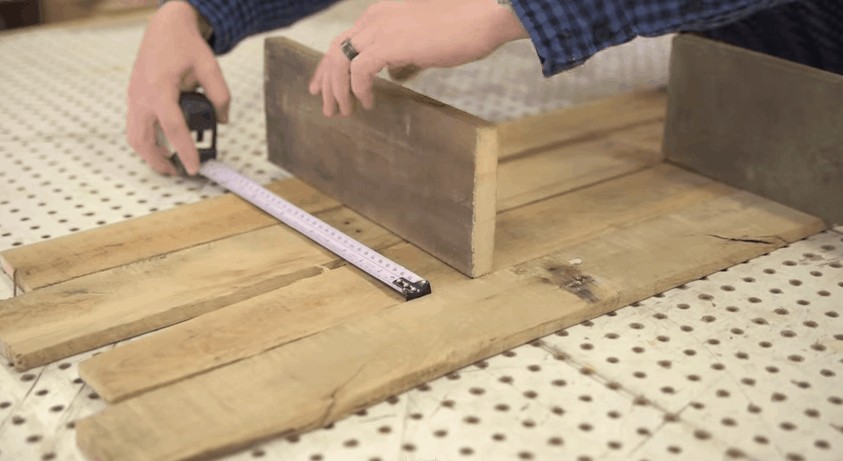
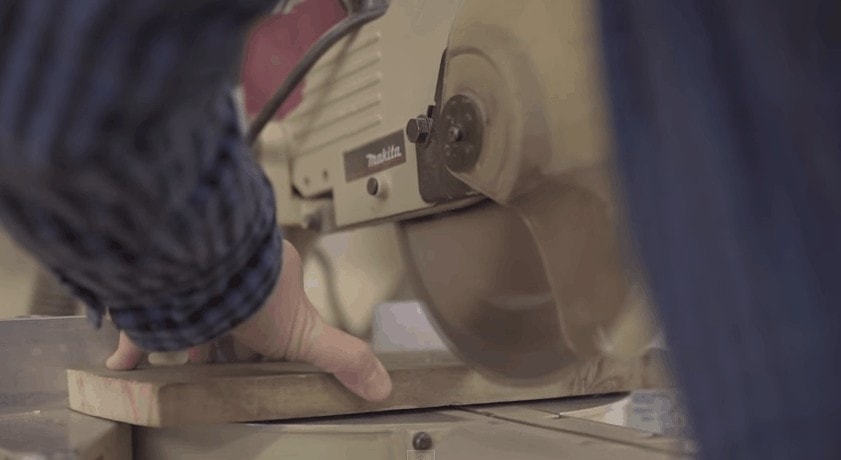
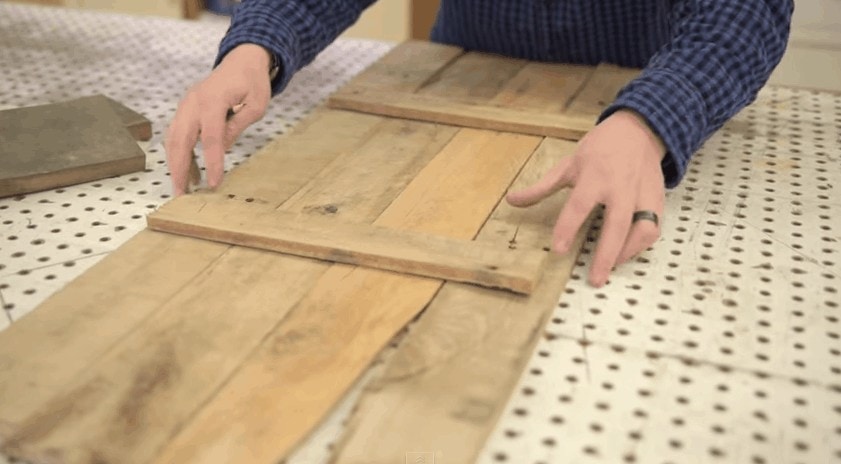
Step 1: Cut the 4 pallet boards to 36 inches.
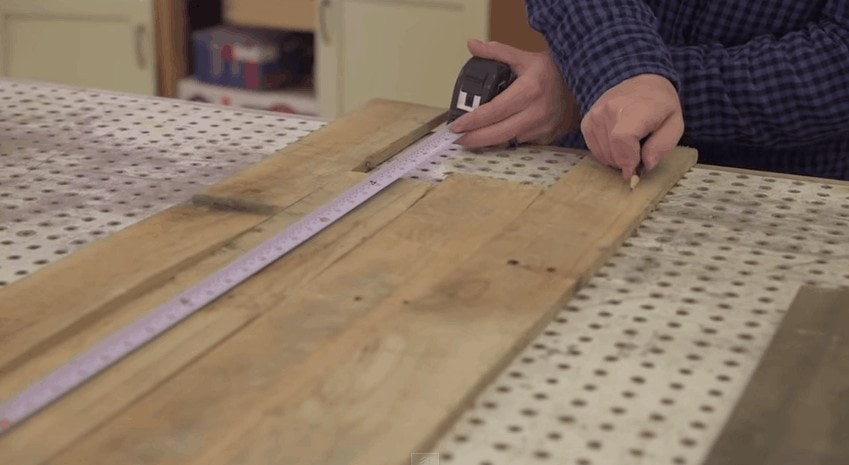
While you may or may not want the boards to be exactly even – you want to start by making them all about 36 inches long. Simply mark the measurements with your pencil, then use your miter saw to make the cuts:
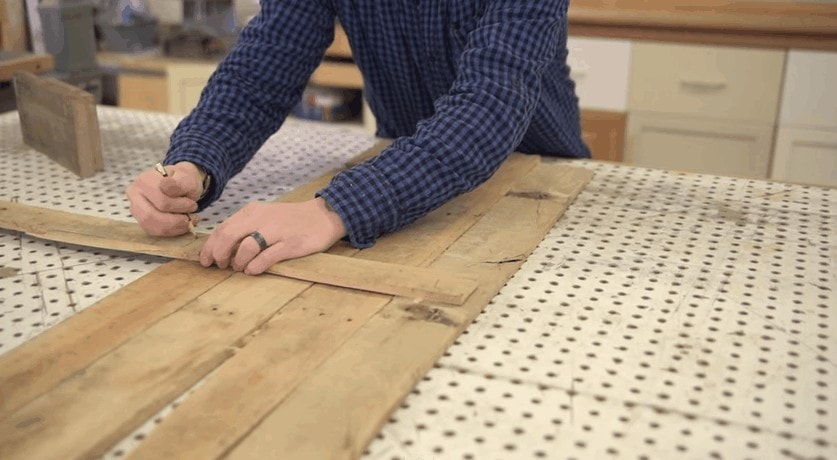
Step 2: Measure and Mark Shelves
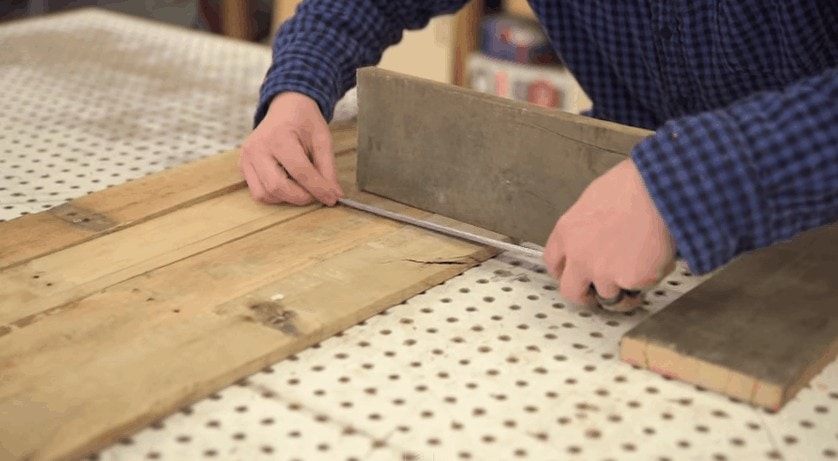
For the bottom shelf, the design shown only used about 7 inches of shelf. So measure one of your shelves to 7 inches and then cut it. For the top rustic wall shelf, this design makes it an 11 inch shelf. So cut your second shelf to 11 inches:
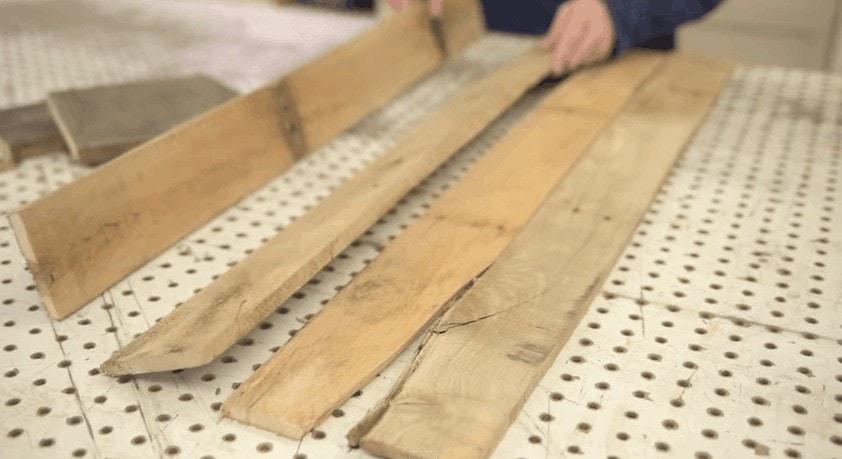
Step 3: Cut The Shelves
While these shelves are 7 inches wide and 11 inches wide, respectively; you could technically make them as long or as short as you’d like, depending on what you plan to hang on them.
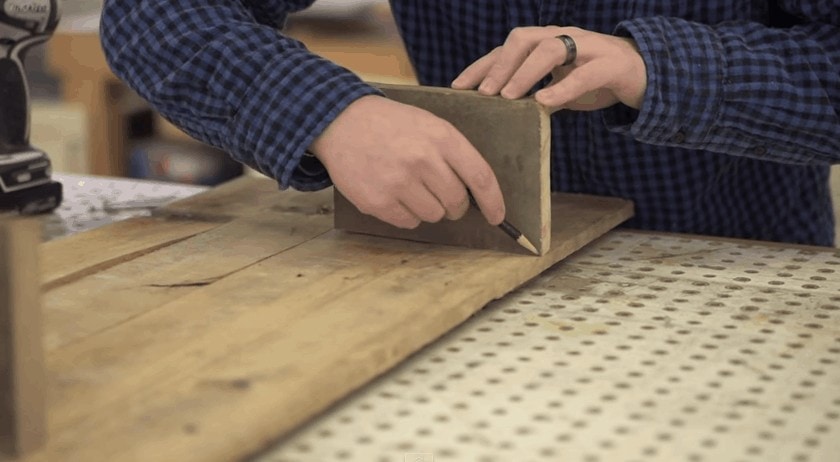
Step 4: Mark and Cut The Braces
Take your one inch scrap board and mark it with a pencil so you can get 2 pieces out of it. As shown below, these 2 pieces are going to be on the back of your pallet wall shelf and serve as a brace, to make it more stable. In this case, simply mark your scrap board so it is a little less than the width of your shelf. Once you’ve marked it, cut your 1 inch board so you get 2 back braces out of it.
Step 5: Flip Your Pallet Boards Over and Attach The Braces
Once you’ve flipped the boards so you are now working on what will be the backside of your shelf, simply put your braces in place and attach them with one inch screws, using at least 3 screws spaced throughout your brace. (Note: places your braces where you plan to put your shelves, as the braces will provide extra support and give you more wood to screw into when you attach the shelves.)
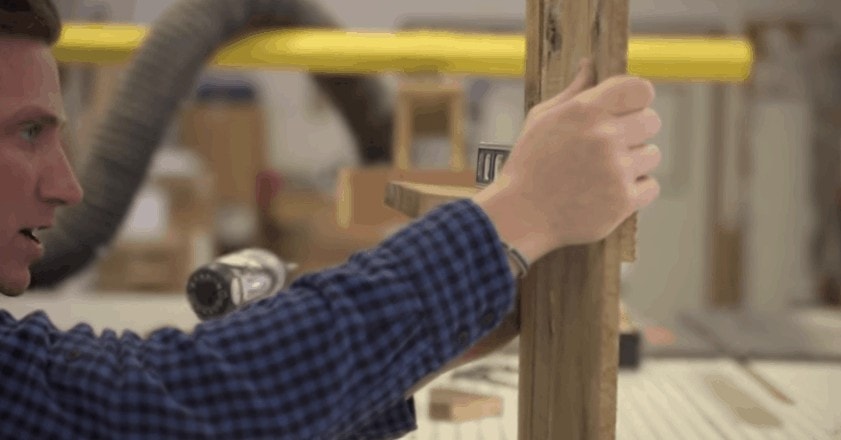
Step 6: Level and Mark Your Shelves
Using a small level and your pencil, put your shelves in place on the front of your shelving unit. Remember that your shelves should be directly on top of the braces you attached to the back, so they have extra support. Mark a line on both sides, so you can see where your shelf will be attached.
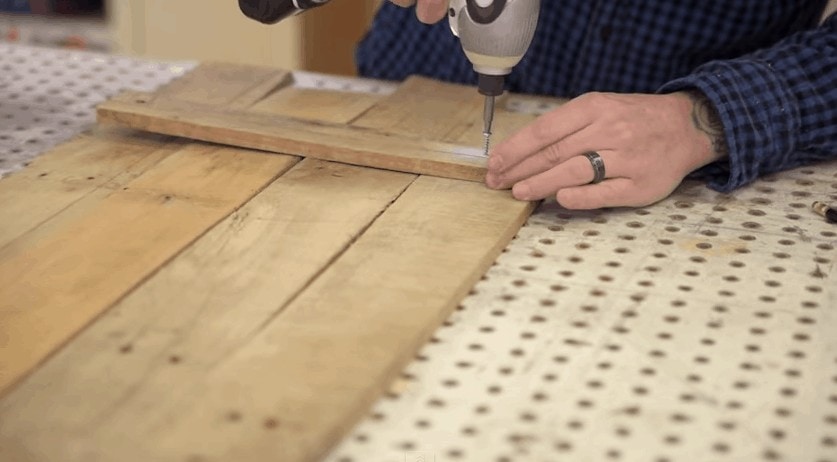
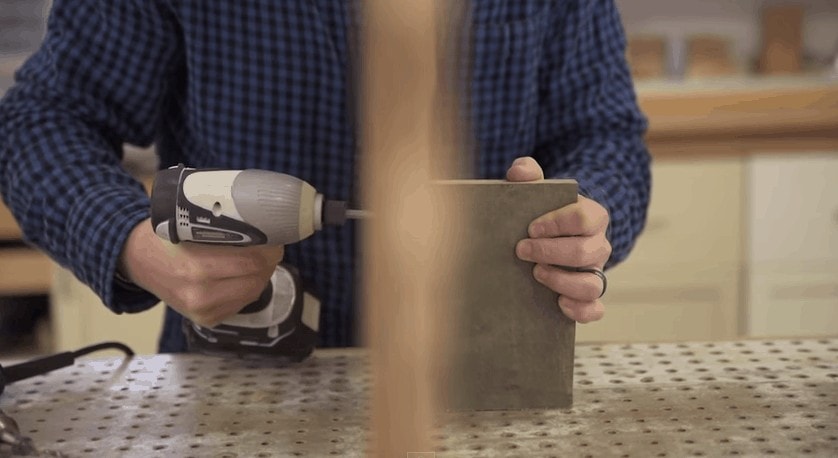
Step 7: Pre-drill Your Holes
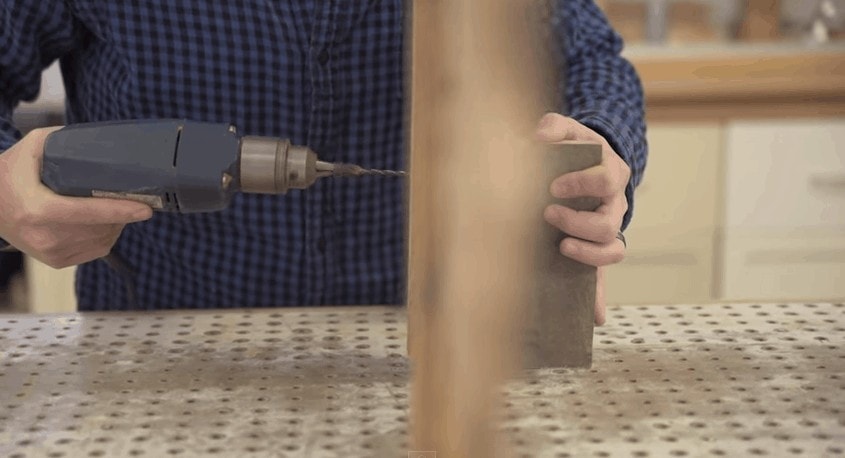
Flip the shelf on it’s side, and hold your shelf into place firmly – using your pencil marks to make sure you are holding it level and in place. Then, use your drill bit to drill straight through your brace, the pallet wall shelf back, and the shelving board. Pre-drilling your holes will make putting the screws in a whole lot easier!
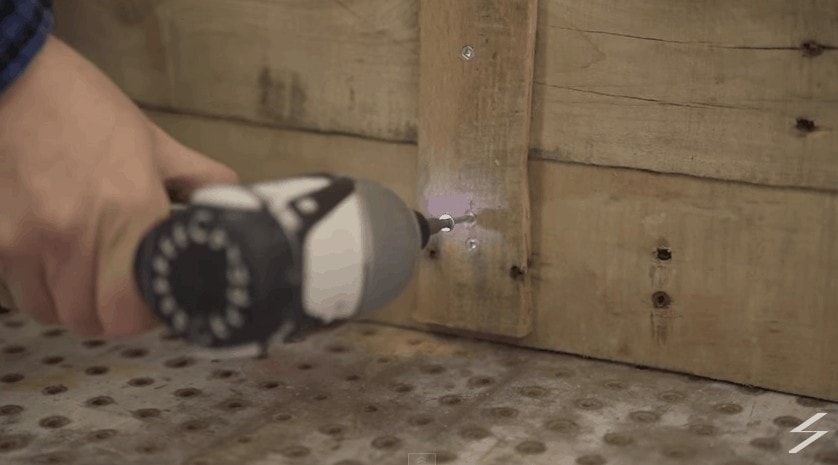
Step 8: Screw in One Side of the Shelf
After you’ve drilled the pilot hole, put one of your 2 1/2 inch screws into that hole, which will attach one side of your shelf.
Step 9: Level The Shelf Before Putting In Your Second Screw
By only putting in your first screw, this gives you a chance to pull out a small level and make sure your shelf is perfectly straight, before putting in your second and final 2 1/2 inch screw.
Once it’s confirmed to be level, repeat step 8 on the other side of the shelf, drilling a pilot hole and putting in your second screw.
Step 10: Repeat For Shelf #2
Attach your second shelf following the same steps that you used for the first one – remember that drilling pilot holes will make putting your screws in much easier.
Step 11: Attach Your Rustic Hook
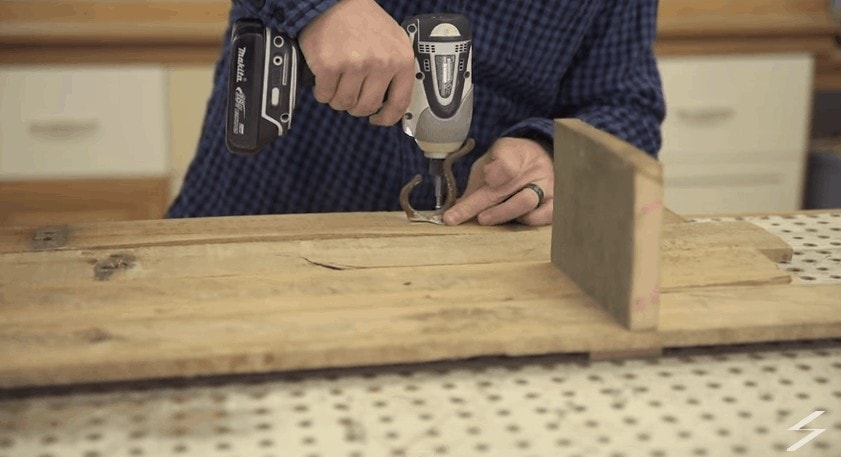
One reason for leaving the shelves a little more narrow in this design is so you can add a rustic looking hook to hang a hat, jacket, etc. next to your shelves. If you have one, find a vintage looking hook and simply attach it with a 1 inch screw.
You’re done!
To watch Jake’s video tutorial to making this shelf, please see below: