Water pooled up on the bathroom floor around the base of a toilet probably spells disaster for most any homeowner. However, before you start thinking about catastrophic flood damage and nightmarishly expensive repair bills, consider that toilets are quite simple and reliable instruments, and there are only a handful of components that can fail or become damaged.
In this article, we’ll focus primarily on leaks coming from the base of the toilet, and go over how to remove the toilet from the floor and inspect/replace the componentry underneath.
We’ll also briefly mention other problems as well, such as a toilet that constantly runs, or has a tank that won’t refill properly.
Base of Toilet Leaking
Before you get your wrenches out and start removing the whole toilet, check a few things out first to determine for sure that there is a leak coming from underneath, and eliminate the possibility of a much simpler fix.
First, mop up any water on the floor around the toilet and dry off the outside of the bowl and tank if they’ve got moisture on them. If it’s just a very small amount of water pooled up on the floor, the problem could be as simple as condensation running down the sides of the toilet.
Next, do a thorough visual inspection. Check all around the base of the toilet for cracks or any sort of damage. Try and wobble the toilet back and forth - it should be very rigid and difficult to move. If it wobbles easily, remove the decorative caps and tighten the bolts down that fasten it to the floor.
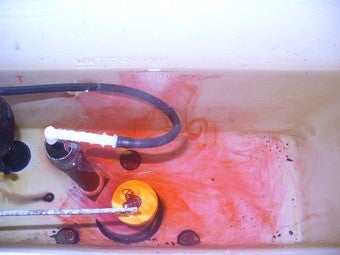
If none of this takes care of the leak, and if nothing appears to be visually damaged or out of place, take the lid off the tank and add a teaspoon or so of food coloring to the water. Make sure the base of the toilet is dry, and flush. Wait about a half an hour to an hour, then take a paper towel or white cloth, and run it around the base of the toilet. If any food coloring shows up, you know you’ve got a leak coming from underneath the toilet, and the whole thing will need to be removed.
Once you determine this is for sure the case, the problem is going to come from one of several different things: a damaged toilet base, an improperly mounted toilet, a worn-out wax seal, or a damaged or improperly mounted flange, and you can proceed with removing the toilet.
First, turn off the toilet’s water supply at the wall. Flush the toilet to empty the tank, and use a sponge to mop up any remaining water inside the tank and bowl. Next, you’ll want to separate the tank from the bowl itself. There should be two nuts on the bottom side of the tank that fasten it. You’ll also have to remove the hose connecting the tank to the main water supply.
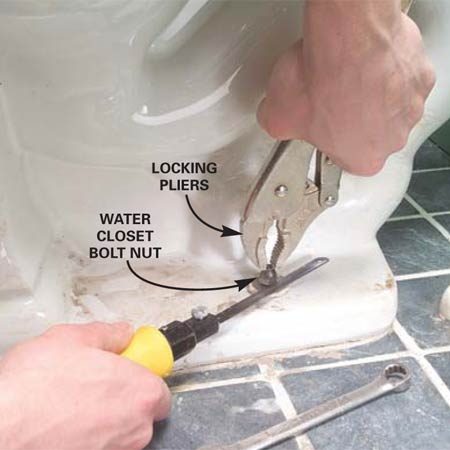
With the tank removed, you can then loosen the closet bolts that fasten the toilet bowl to the floor (and the flange underneath). If the toilet is caulked or sealed to the floor, use a thin metal putty knife to remove the seal. Take care in doing this properly, because you don’t want any flooring to come up with the toilet when you pull it out.
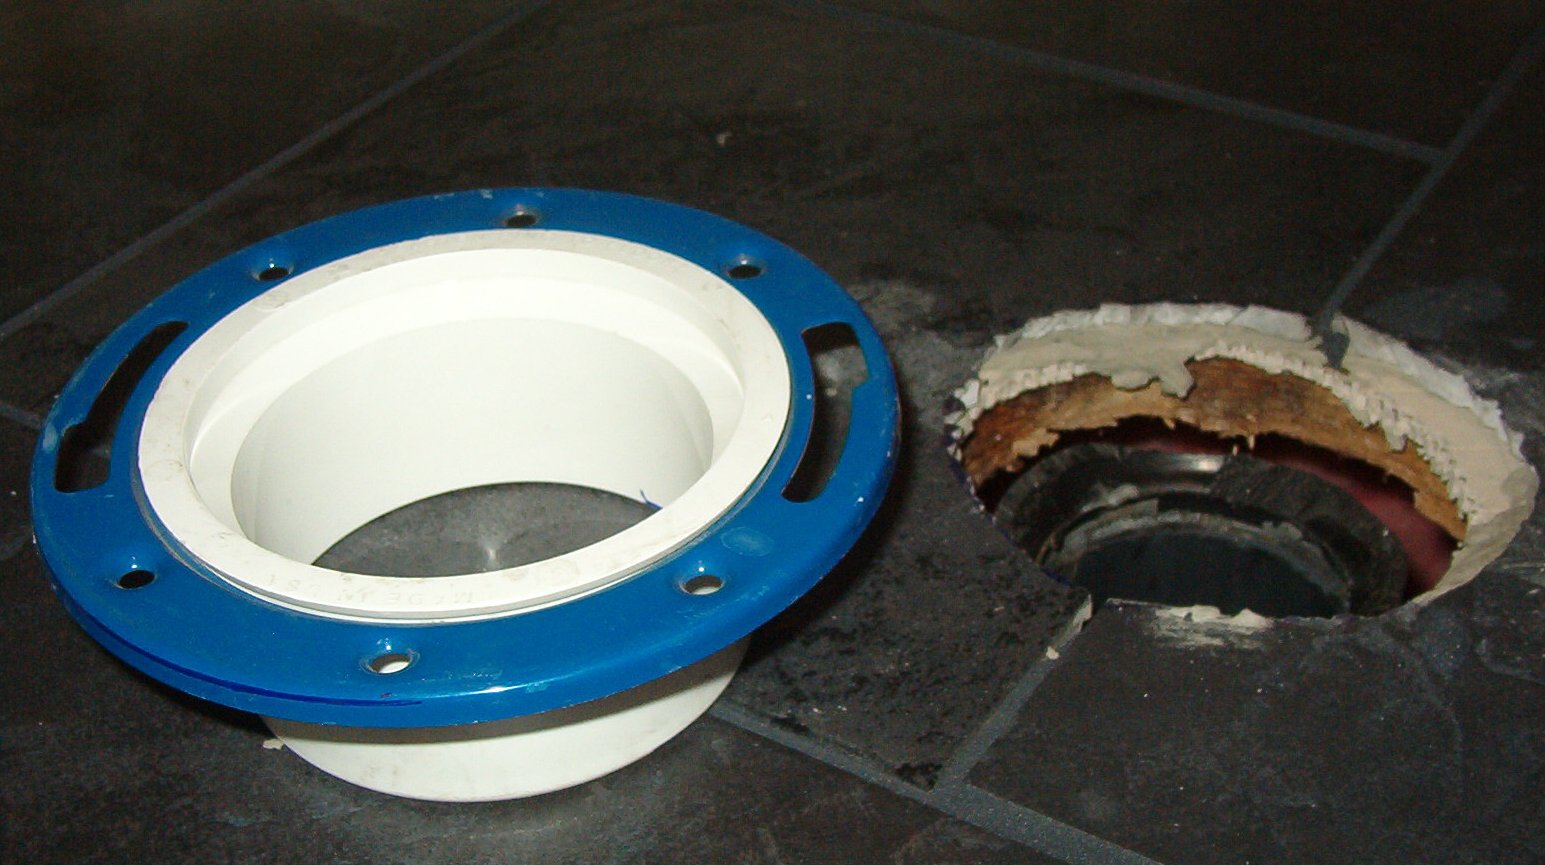
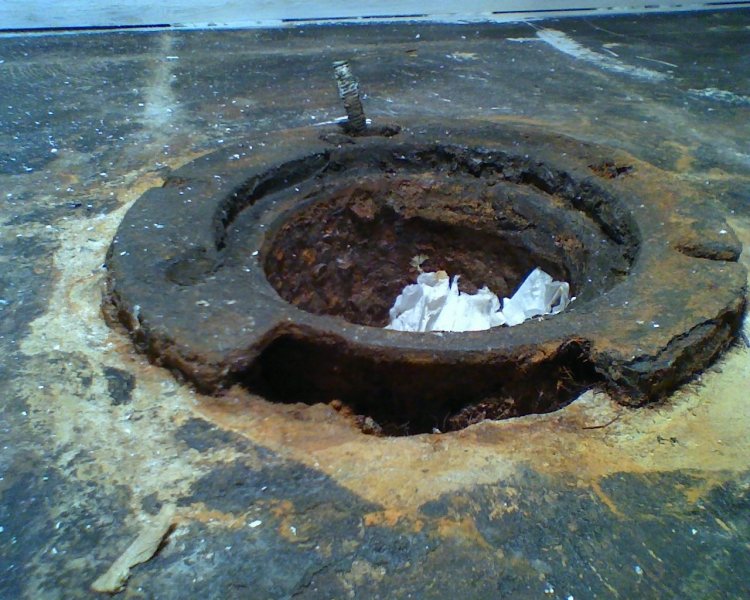
With the toilet removed, you can now inspect the condition of the flange and the wax seal. Check the underside of the toilet as well for any damage.
Ensure that the flange is fastened properly to the floor. If it’s damaged in any way, it will need replacing. Replacing the flange can be a rather difficult process, but we’ll get back to that in just a second.
If the flange is not loose and it appears to be in good shape and fastened properly to the floor, you may be able to get by with just replacing the wax seal. Scrape off any of the old seal and clean the area thoroughly before installing the new one.
If you’ve determined that the flange needs replacing, you’ll need to remove the old one from the piping that’s coming up from the floor. This can be done in one of two ways. If the old flange is mounted around the outside of the piping, you’re in luck and can simply by an appropriate sized flange that will fit on the inside of the piping.
If the old flange is secured to the inside of the pipe, you’ll need to remove it or break it away before installing a new one. This can be a rather difficult undertaking, depending on what was used to glue it in place. Here’s a great video showing a few different techniques to get the old flange out.
Another thing worth mentioning is what sort of flooring the flange is fastened to. If you’ve got a damaged, leaking flange that is fastened to any sort of subflooring, it’s likely that the subflooring has been damaged and will need to be cut out and replaced as well. This is where your repair project can get a little hairy and potentially hit a few snags.
However, (hopefully) the flange is fastened directly to concrete slabbing, in which case it will just be a matter of removing the old one, and installing the new one. If there is any sort of cracking or damage to the toilet itself, you don’t have many options other than to buy and install a new one.
Other Toilet Leaks and Problems
If you’ve got a constantly running or dripping toilet, you can almost bet that the problem is coming from a faulty flapper.
The rubber flapper creates a seal and ensures that water in the tank can’t get down into the bowl - when you press the handle to flush the toilet, the flapper opens, allowing water in the tank to rush down into the bowl and flush out the contents. If the flapper is faulty, there won’t be a proper seal and water will constantly be leaking from the tank down into the bowl. You can use the same trick of adding food coloring to the tank water to check whether or not this is the case: add the dye to the tank, and if it ends up down in the bowl water without flushing, you know there’s a leak.
If the flapper is not the problem, then the leak is coming from the drain seat and the whole flush valve apparatus will have to be replaced.
If you use an in-tank bleach cleaner, these products can quickly deteriorate the rubber flapper and other componentry inside the tank. It’s recommended to add any sort of liquid cleaners to the water in the bowl, instead of the tank.
If you’re having issues with the tank not re-filling properly after a flush, you could have an issue with your float mechanism or fill-valve.
Sediment can accumulate at the fill-valve cap, preventing it from sealing and not allowing water to enter from the water supply line.